How to Make a Hello Kitty Cookie
How to make a Hello Kitty Cookie – a life skill every Hello Kitty Fan should have.
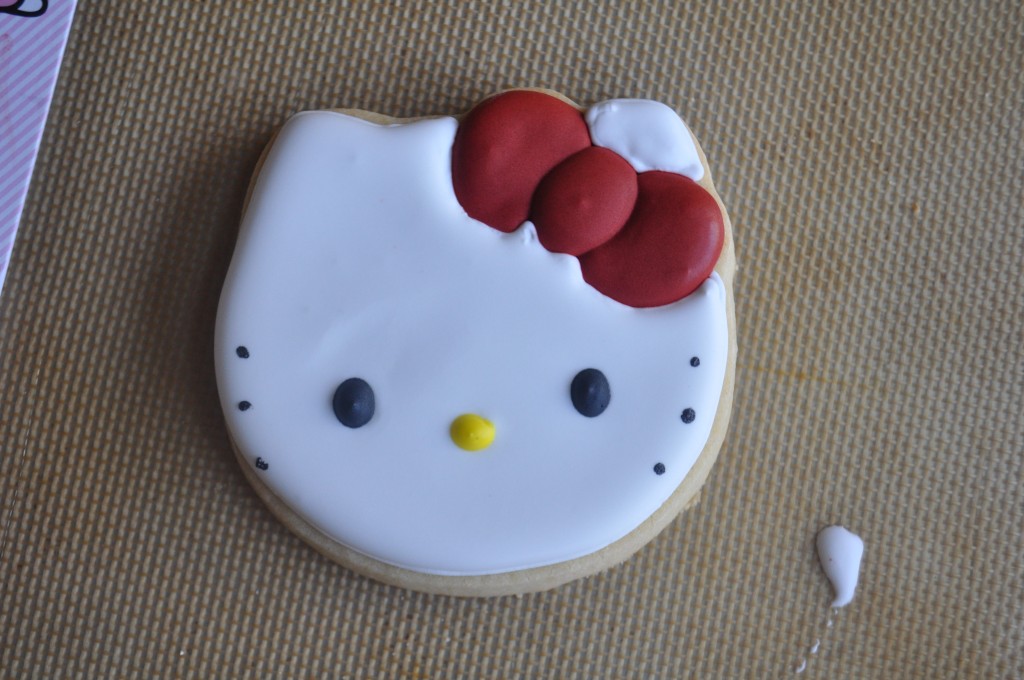
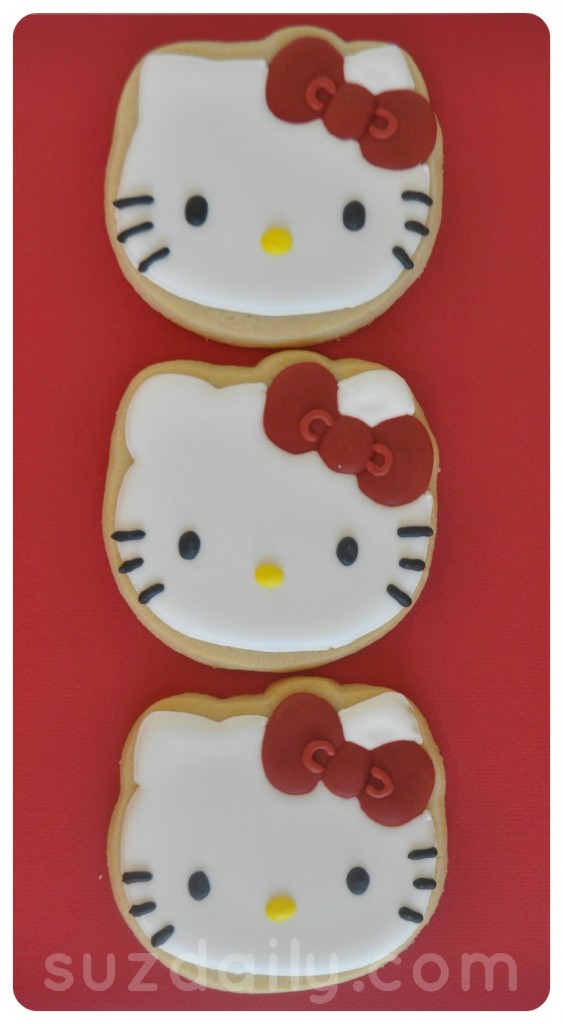
I thought a lot about this design. A little too much. Outline in black and fill in? Or no black for Hello Kitty or her bow? I looked at pages and pages of Hello Kitty images until I decided how to make these. A two dimensional Hello Kitty cookie, or image uses a lot of black outlines. That is what I do for more detailed cookies. A three dimensional Hello Kitty cookie, if there is such a thing is not outlined in black, rather the icing allows for a sectioned look. I could have improved the bow by doing it in 3 sections instead of two.
Step 1 on How to make a Hello Kitty Cookie: Prepare Royal Icing
At least one day, or two days prior make the royal icing. You do not need to thin it out, just mix up a batch. Here is how I make my royal icing.
How to make red royal icing: Use red dye and add it to a small amount of royal icing until it is a deep orange color. In the next day or two the color will develop. Before you make the cookies add a bit more red dye until you get the color you want. I prefer to use either Wilton “no-taste” red or Americolor tulip red with just a touch of brown.
How to make black royal icing: Do this in advanced as well, add black dye until the icing is a charcoal grey. Again, the color will develop over the next day or two. Right before you use the icing add additional black dye. I prefer Americolor Super Black. Wilton black dye is fine if that is all available.
How to make yellow royal icing: Easy – just add a bit of any yellow food coloring to a small amount of royal icing.
All your need for these cookies is white, red, black and yellow; however, it is always fun to make a Hello Kitty Cookie with all sorts of bow variations. I have even seen her wearing a hat or with flowers in her – hair?
Step 2 on How to make a Hello Kitty Cookie: Prepare sugar cookie dough
Prepare sugar cookie dough at least several hours before baking or the day before. Sugar cookie dough lasts for a few days in the refrigerator or up to 2 months in the freezer. Here is how I make my sugar cookie dough and the recipe I like to use.
Step 3 on How to make a Hello Kitty Cookie: Cut shapes and bake cookies
Use a Hello Kitty cookie cutter to make the shape of the Hello Kitty Head. If you do not have the cookie cutter, simply print out a Hello Kitty image, cut out, and trace this on to a paper plate. Use a paring knife to cut out the shape of Hello Kitty’s head. Bake cookies as directed in recipe above. Cool completely on a cooling rack.
Step 4 on How to make a Hello Kitty Cookie: Decorate
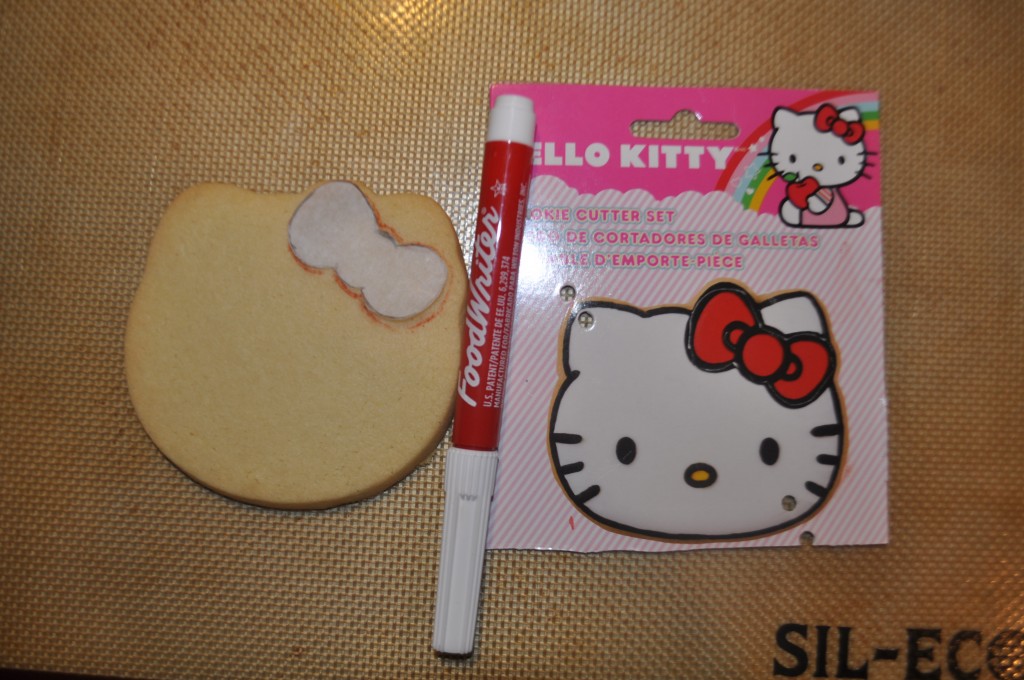
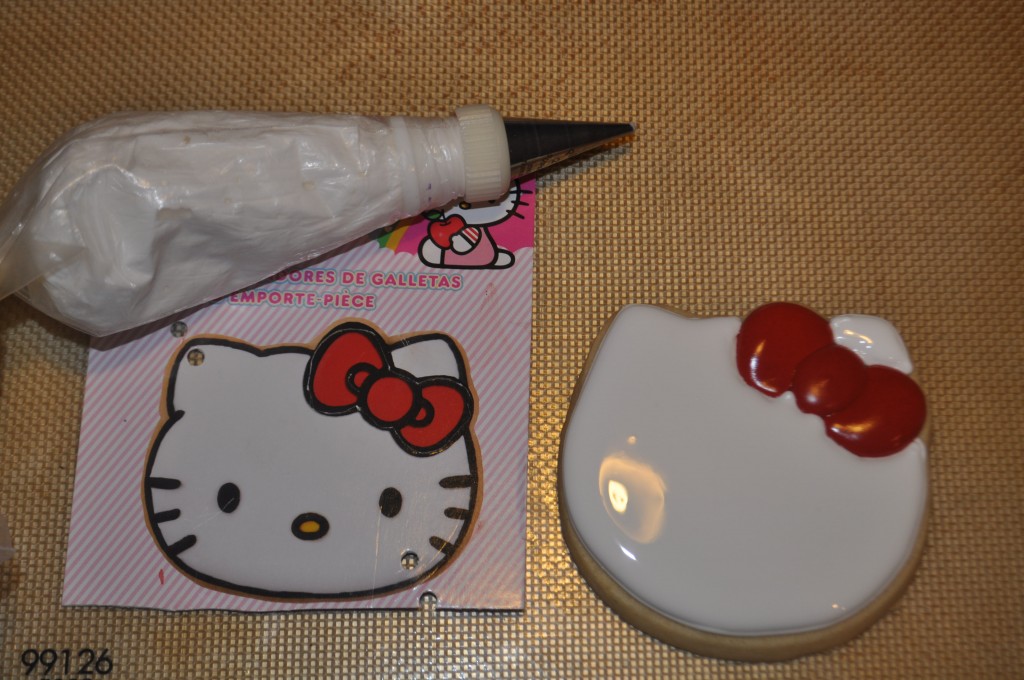
To start, you will create the bow. I cut a piece of parchment paper the same size as the bow and used it as a guide.
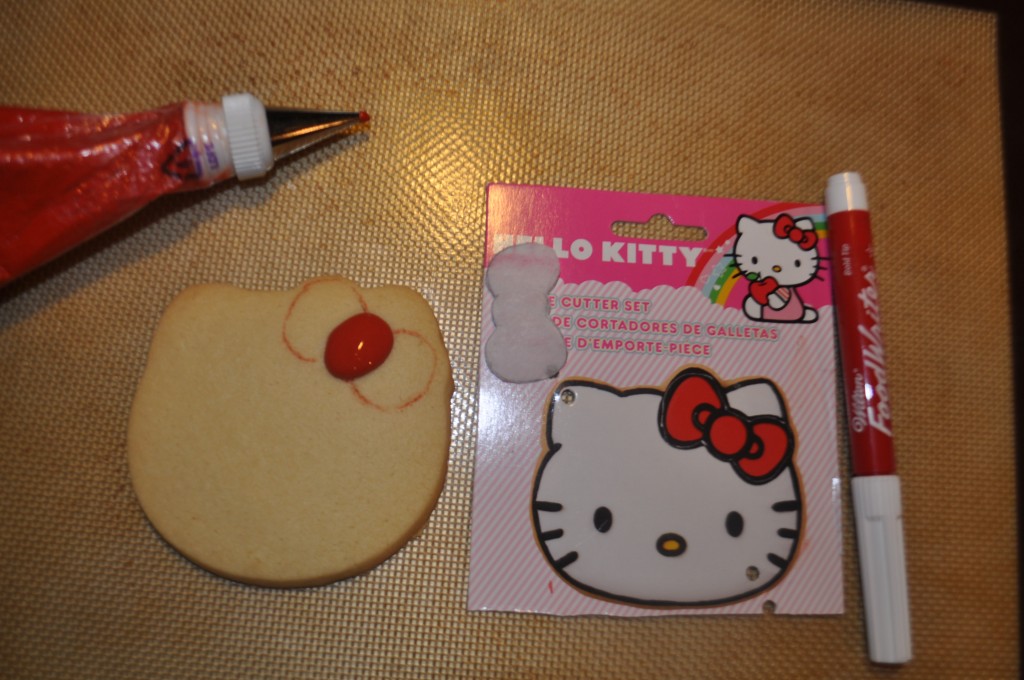
Place the bow on top of the cookie and trace with an edible ink marker. Or, you could use a knife to carve the outline of the bow. Hello Kitty’s bow is not exactly symmetrical so you have to be careful to make it just right.
Using a size 3 Wilton tip, outline the center of the bow and fill in. Note about consistency… this icing is somewhere between thin flood icing and thicker outline icing. I thin it until it forms peaks that immediately fall over. This is similar to what other people call 20-second icing. It’s like a thick flood icing. When a knife is pulled through the icing the line will disappear in 20 seconds.
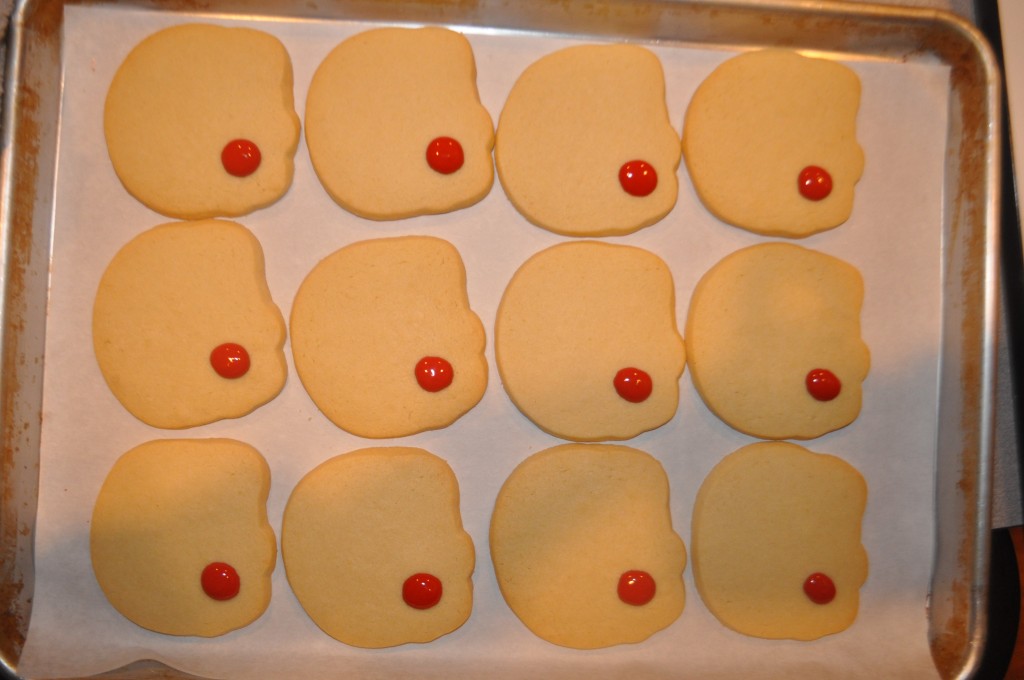
I like to do this assembly line style. Here I have added the bow centers to a dozen Hello Kitty cookies. If you wanted a bit of glitter on the bow add it now to that section.
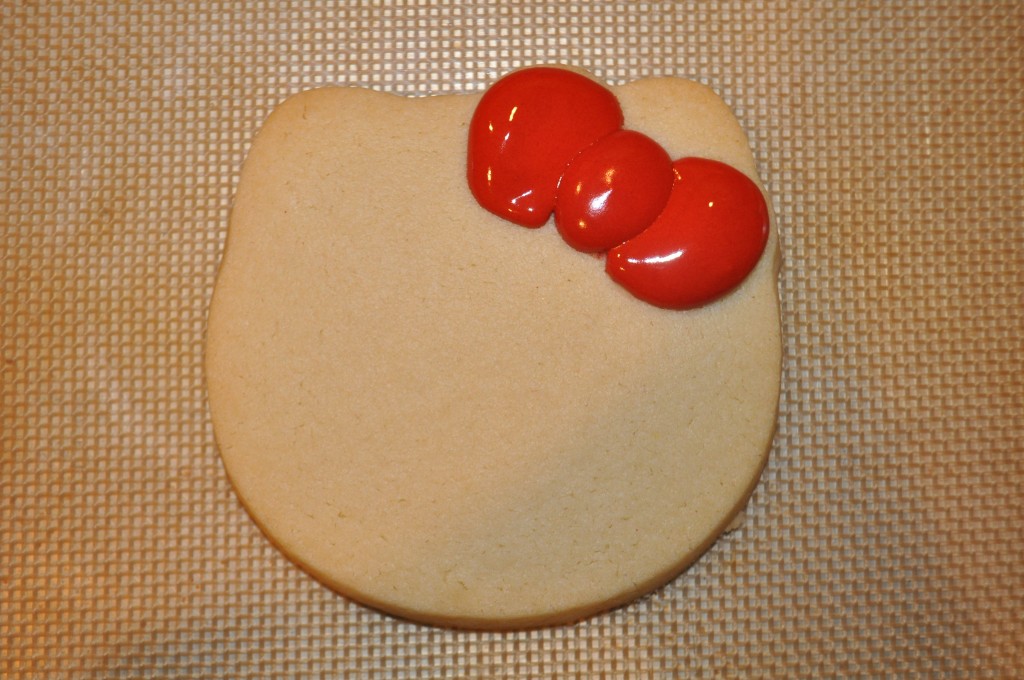
When the center of the bow has dried, about 20-30 minutes later, add the sides of the bow, again using the guides you drew earlier. Fill in.
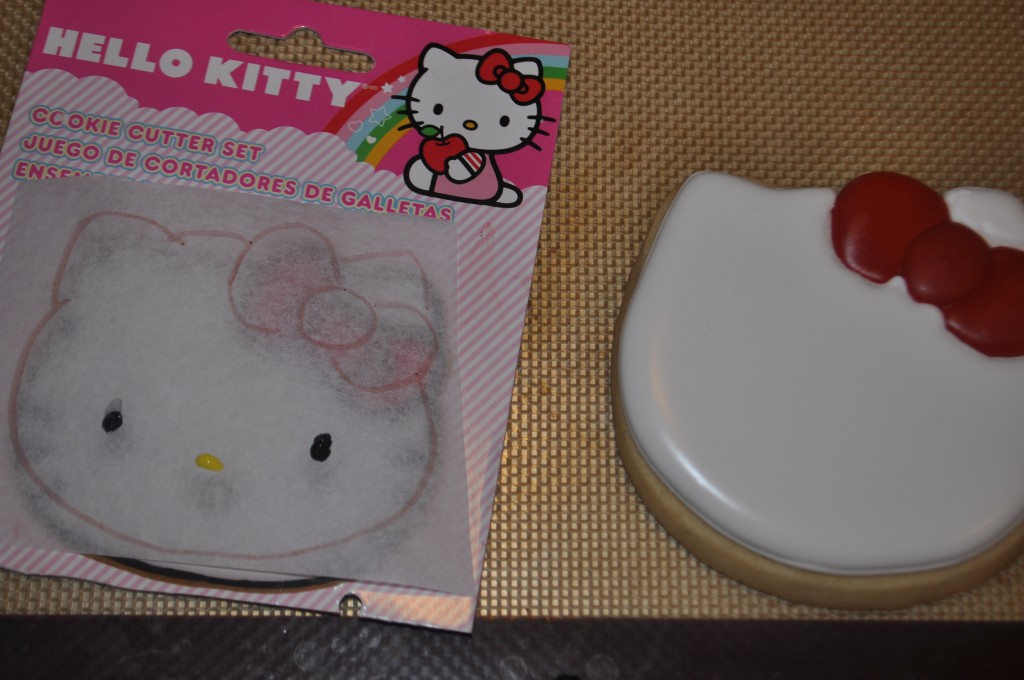
About 30 minutes later outline in white icing and flood with thinned white icing. Make sure the bow has set or the red dye may run into the white icing. This cookie is not perfect. I should have made a parchment outline of Hello Kitty’s face. I made the white icing come down to far. Use a size 2 Wilton tip.
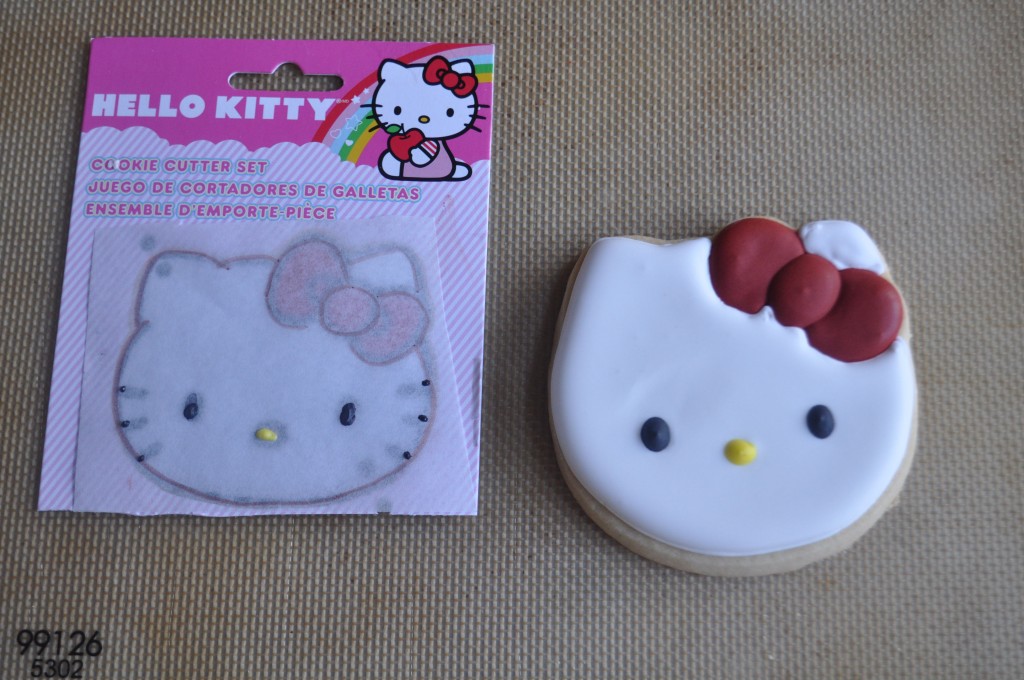
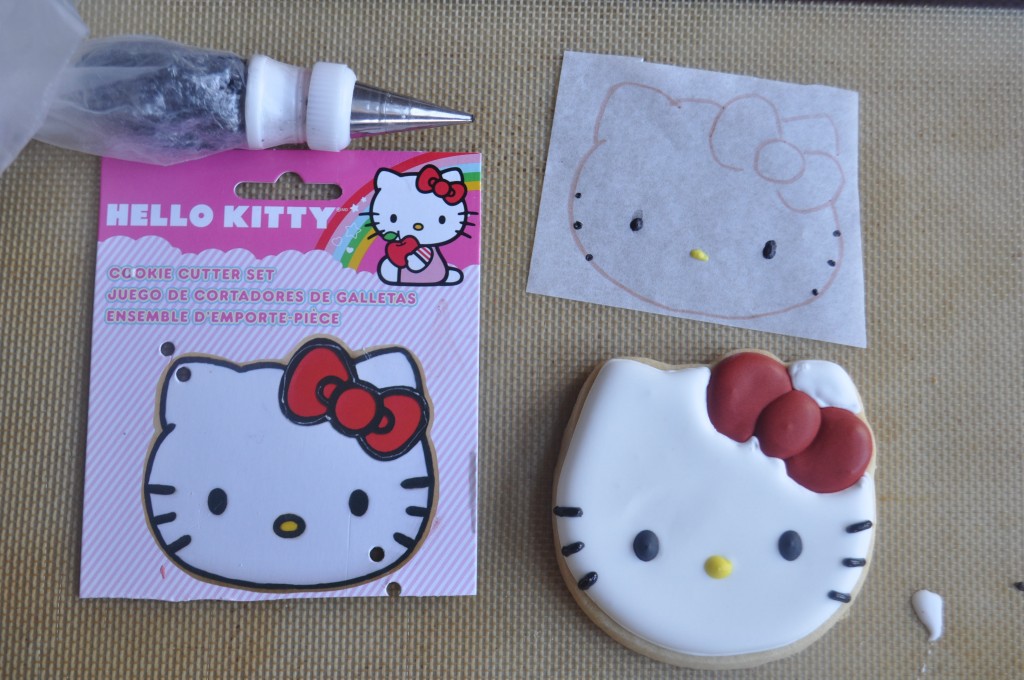
To transfer the face image onto the cookie I use what I call the parchment “the stamp method.” I outlined Hello Kitty’s head onto parchment paper then put a tiny dot of yellow icing and black icing to get correct placement of the eyes and nose.
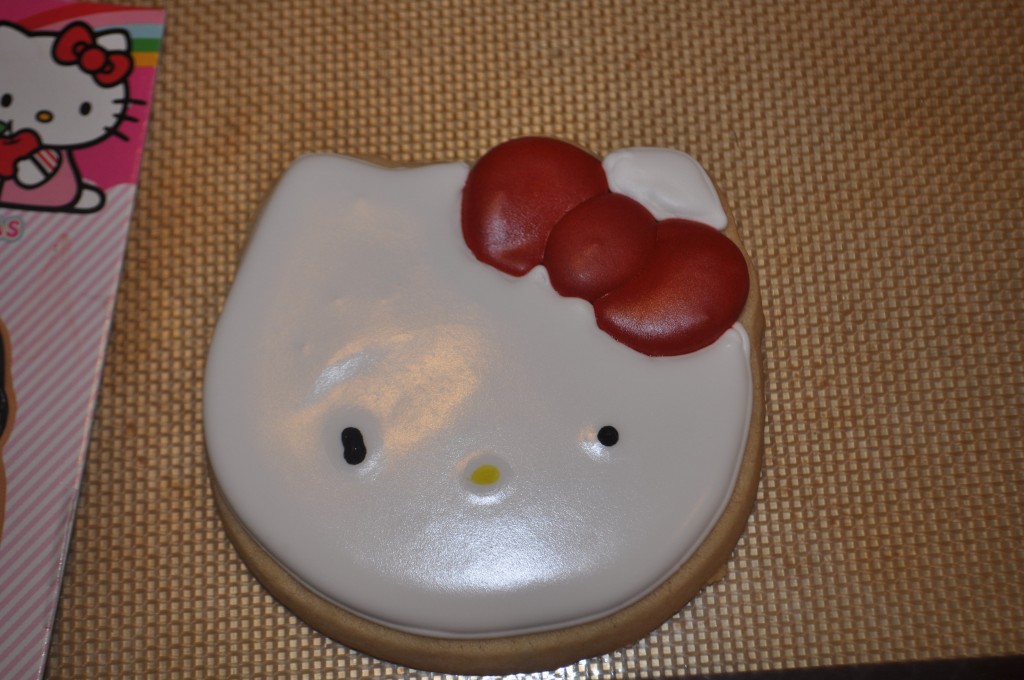
It looks strange at this point but now I know where to put the eyes and nose.
I fixed the eyes and let the cookie dry. The next day use the same “stamp method” to place the whiskers on the Hello Kitty Cookie. Make the dots on the parchment paper and flip the parchment paper over, very carefully to give you guides as to where to put the whiskers.
Now I know where to place the whiskers on my Hello Kitty cookie. Use black icing, thinned to piping or outline consistency for the eyes and whiskers. The yellow icing should be the same. I used size 2 tips because these are large sized details.
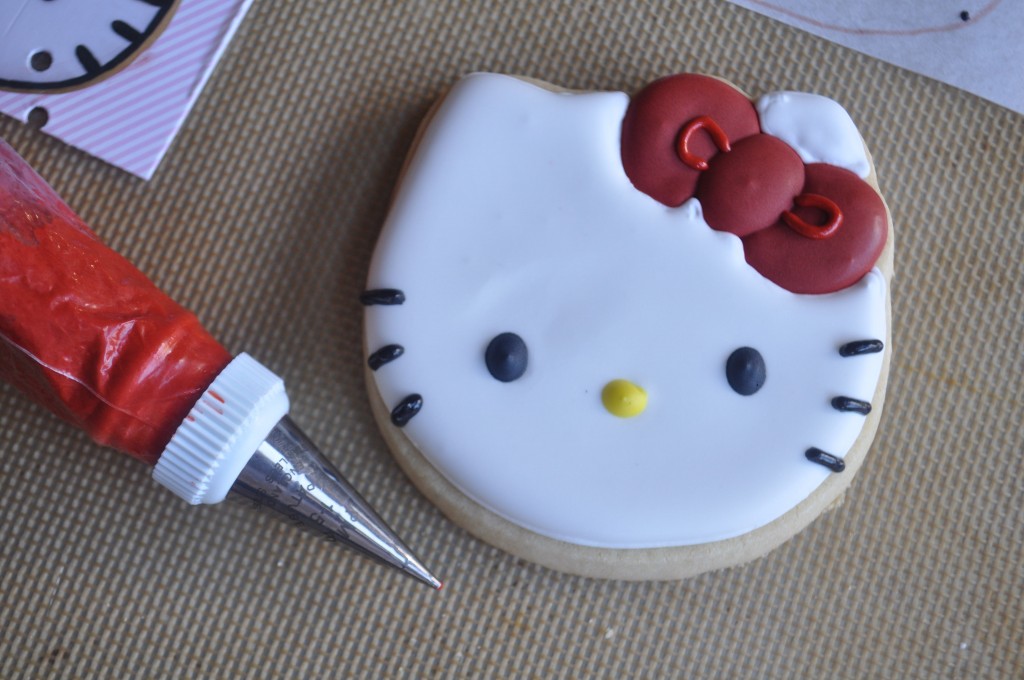
Finish adding the whiskers to the Hello Kitty Cookie. Keep the image close by as a guide. Again, I made the head to big. UGH!
Add details to the bow using the red icing and a PME 1.5 tip. Its just to small loops to complete the Hello Kitty Cookie. Let the cookie dry completely before packaging.
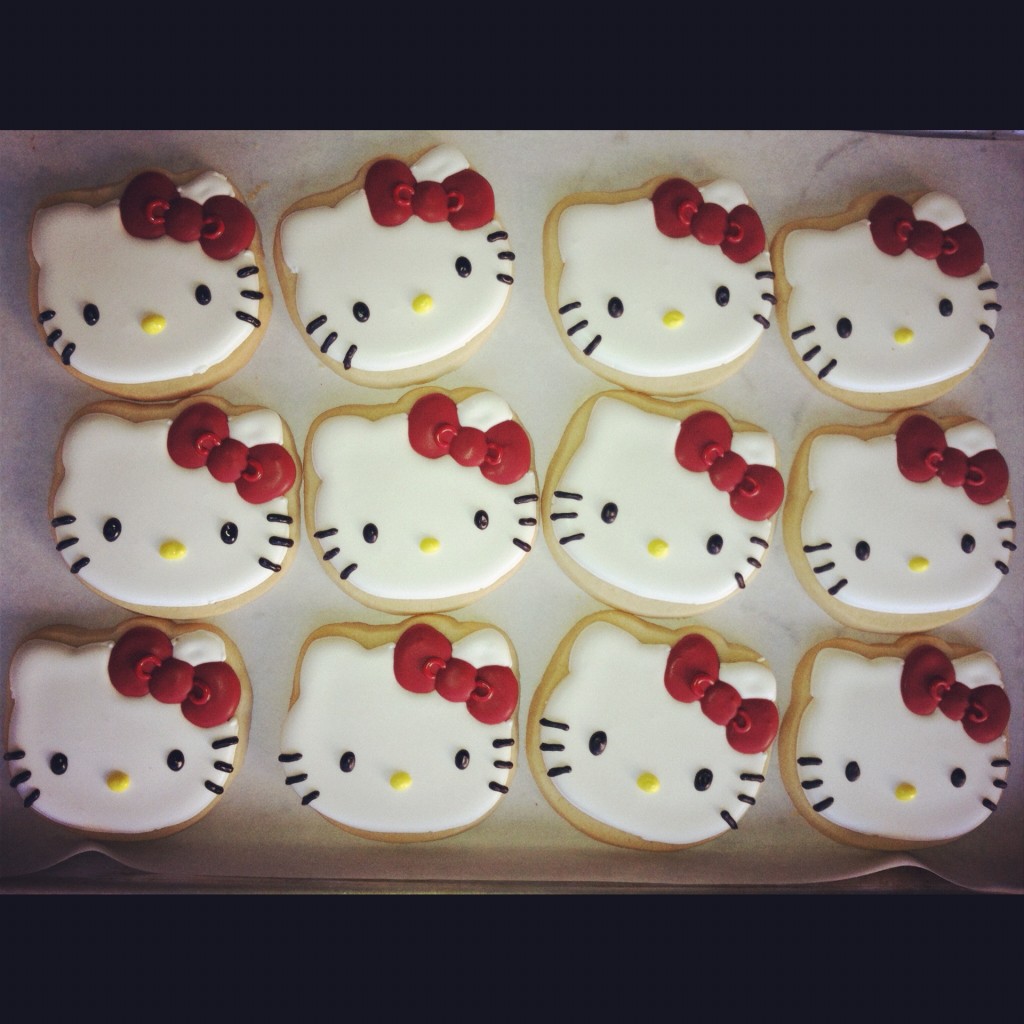
Here are all the Hello Kitty Cookies on Instagram. Doesn’t Instagram make everything look cuter?
Try to make these – I hope I helped you figure out how to make a Hello Kitty Cookie!



Wow, this step by step is exactly what i needed!!! thanks so much for showing the tools you prepared them with!!! yay. i appreciate the help!!!
thank you! I love your blog
Thanks so much Jessica!
I’m so glad people are enjoying this as much as I do!
Happy Baking!
Suz
thank you! I love your blog and cookie artwork
Jessica,

Thanks for looking! I love making cookies and sharing any ideas!
Suz
Thank you, this helps alot.
Good I’m glad you liked the tutorial. This is such a fun cookie to make.
So adorable. I wish I can order from you for my daughter’s birthday.
Thank you! I do take orders depending on my availability. sweetsbysuz@gmail.com 0 thanks for cooking!
Thank you! I do take orders depending on my availability. sweetsbysuz@gmail.com 0 thanks for looking!
thank you so much for all the details! i am organizing my daughter’s 3rd birthday party and hello kitty is the theme. i have a few questions though. why did you decide to do the bow first, rather than putting the bow over white icing?? and how long ahead can i make these cookies before serving? can i freeze them or refrigerate them after icing??
thank you sooo much!!
Michelle,
Thanks for looking! As to the bow, I decided not to put it on top of the white icing because when you layer too much royal icing on top of royal icing it sometimes makes the icing very hard to bite into. My kids also do not like to have too much icing on their cookies. If you prefer, go ahead and put the bow on top of the white icing – It will just have double the royal icing layer… i hope that makes sense.
You can freeze them after Icing. I did this for Thanksgiving cookies 2 weeks before turkey day. They were just fine. I did not package them carefully in the freezer so some of the details flaked off. If you want to make them ahead, just layer them very carefully between pieces of parchment or wax paper so they don’t get damaged. I put them in a place where they got knocked over a lot by my family. So yes, with a little TLC they are fine in the freezer.
Let me know how it goes!
Suzanne