How to Make a My Little Pony Cookie
I made these My Little Pony Cookies for my Niece Lily’s Fifth Birthday. They were definitely a hit! This pony’s name is Fluttershy.
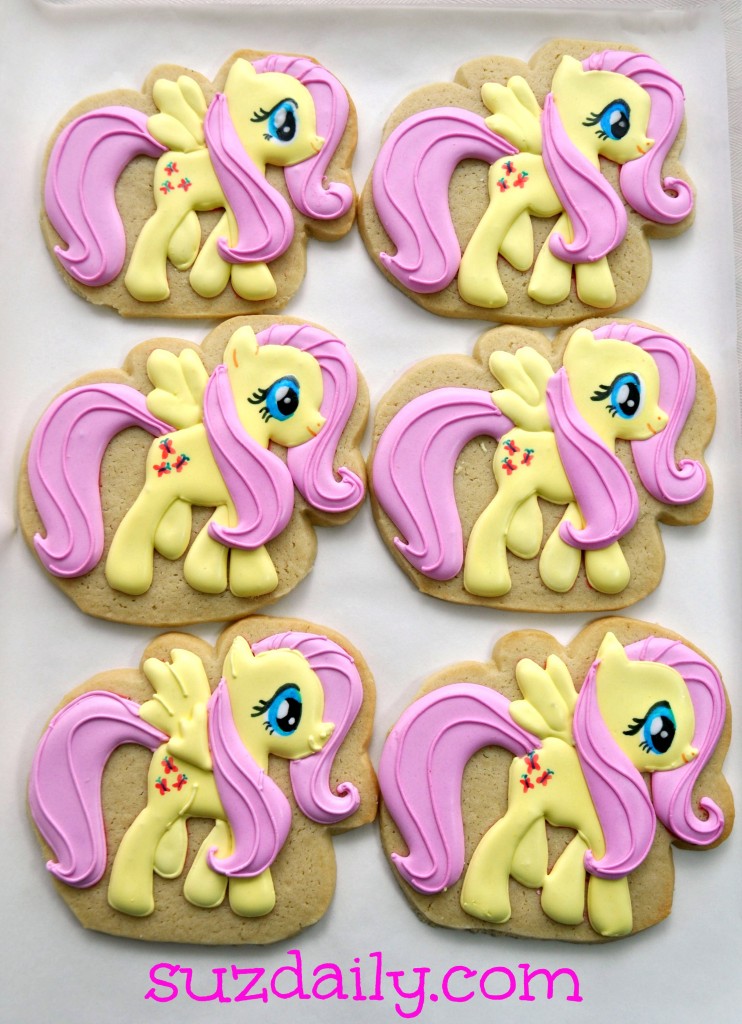
These My Little Pony cookies were pretty time consuming, so I made six total with some coordinating flower cookies. One of these cookies made it on top of the most delicious chocolate cake.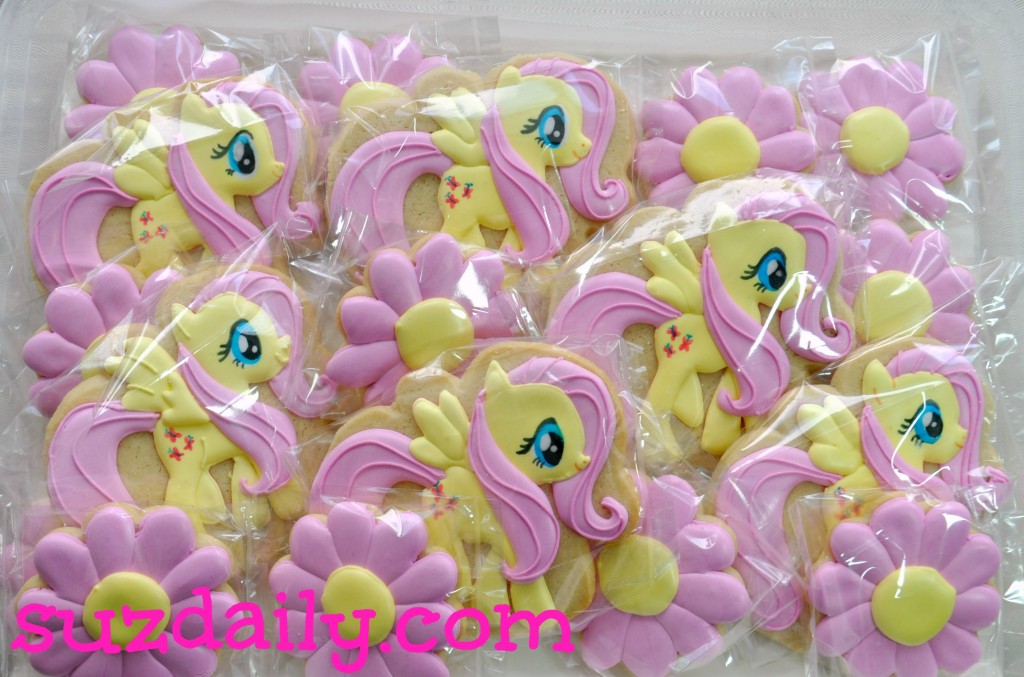
Here is how the party tray looked. I thought the flowers coordinated well with the My Little Pony Cookies. Keep reading for a detailed description on how I made these cookies…Step 1 – How to Make a My Little Pony Cookie – Prepare the cookie dough
Prepare sugar cookie dough at least several hours before baking or the day before. Sugar cookie dough lasts for a few days in the refrigerator or up to 2 months in the freezer. This is the recipe I used for the My Little Pony Cookies and most sugar cookies.
Step 2 – How to make a My Little Pony Cookie – Cut Shapes and Bake Cookies
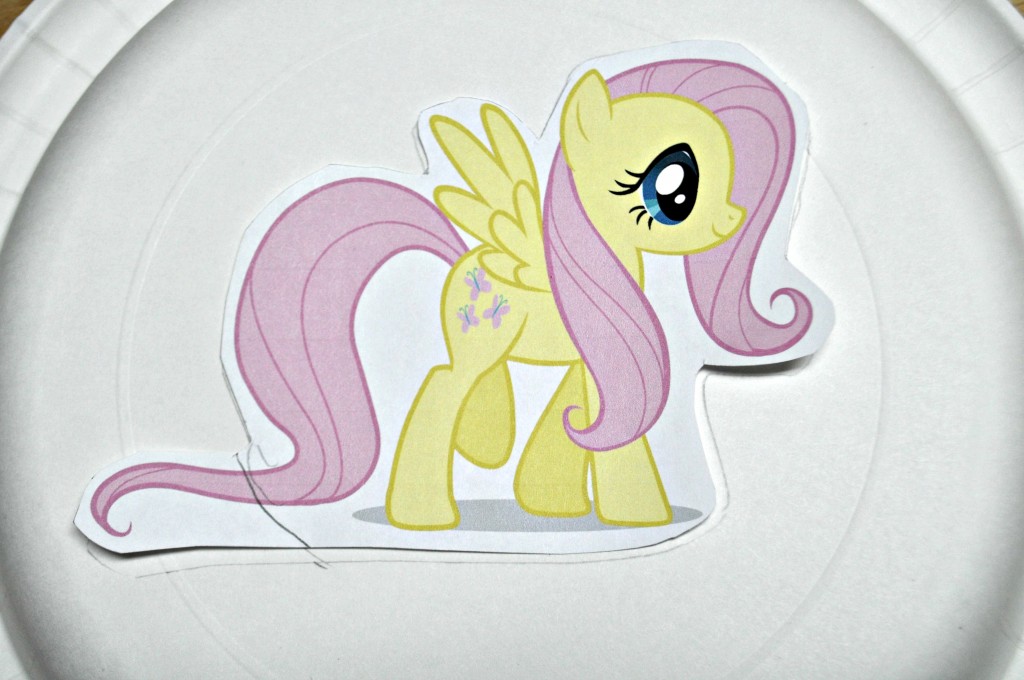
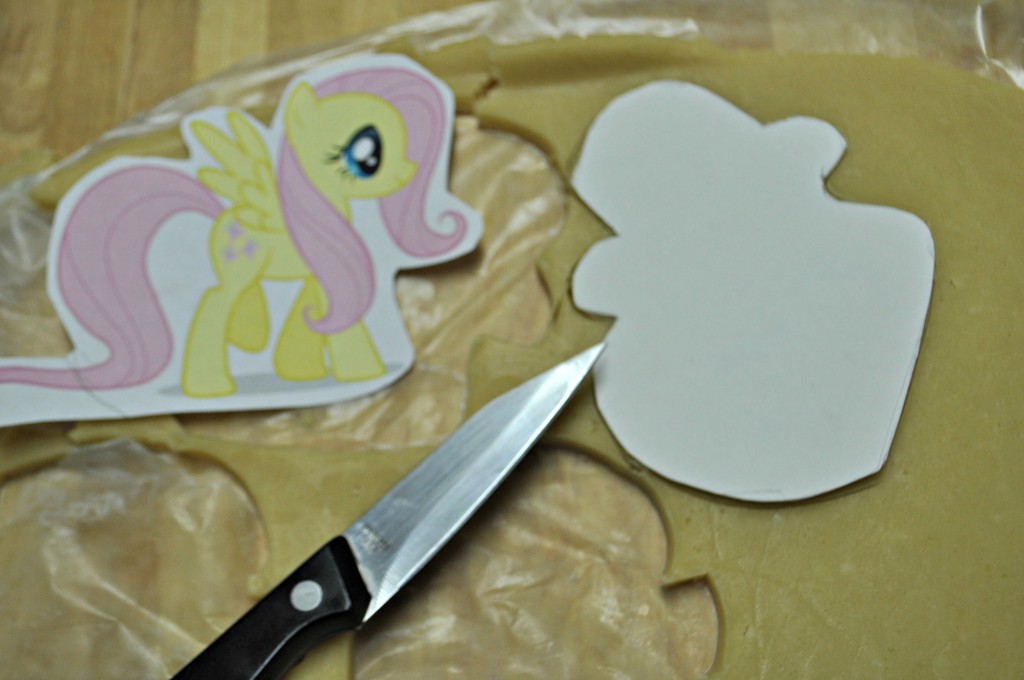
Use an image of a My Little Pony cartoon to cut out the cookie. I am realistic when it comes to how complicated of a shape I can handle. In this case I did not try to make the shape of the cookie exactly the same as the shape of the image.
For the My Little Pony Cookie template I start by outlining and cutting the pony shape on the back of a paper plate… keeping all things touching the dough food safe.
I use a sharp paring knife to then cut out the dough. Make the dough is very cold so that it is easy to cut out the shapes and trace the My Little Pony cookie template with a knife.
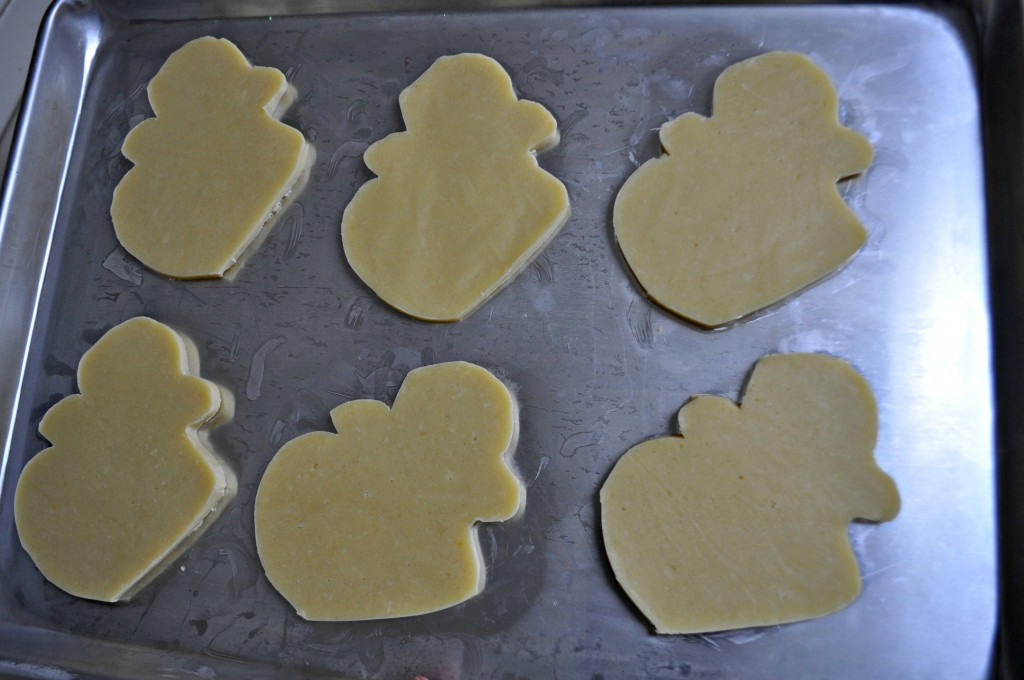
Chill the shapes before baking. This helps keep the spreading to a minimum.
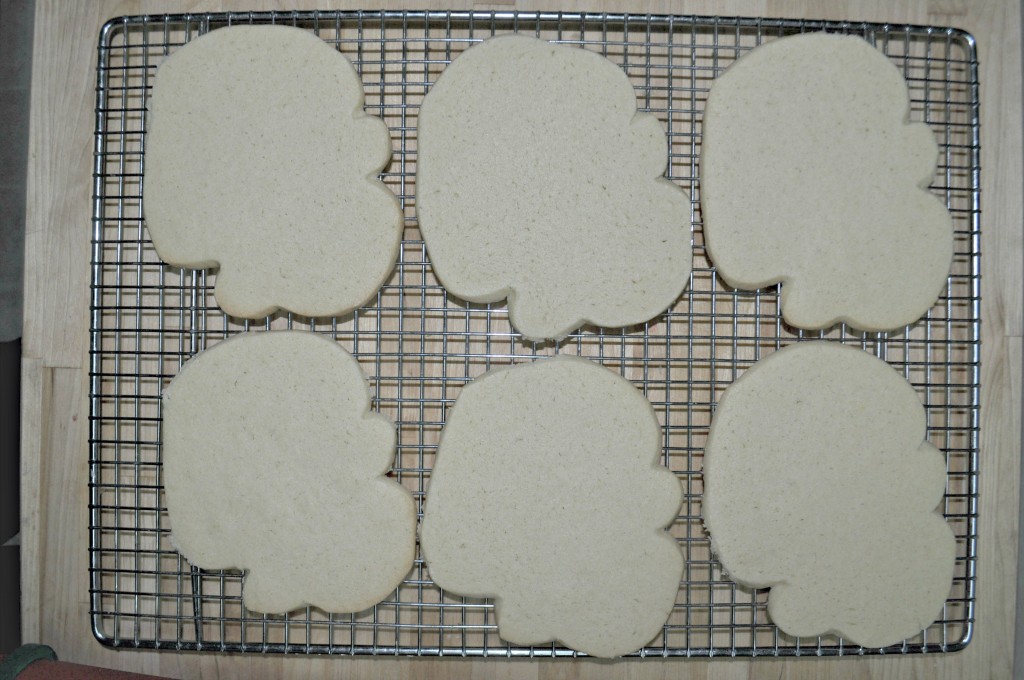
Here are the My Little Pony cookies blank. Yes, I did experience some spreading today. I don’t mind at all and will continue to use my favorite sugar cookie recipe because it is so delicious. Use whatever sugar cookie recipe you prefer.
Step 3 – How to Make a My Little Pony Cookie – Prepare icing.
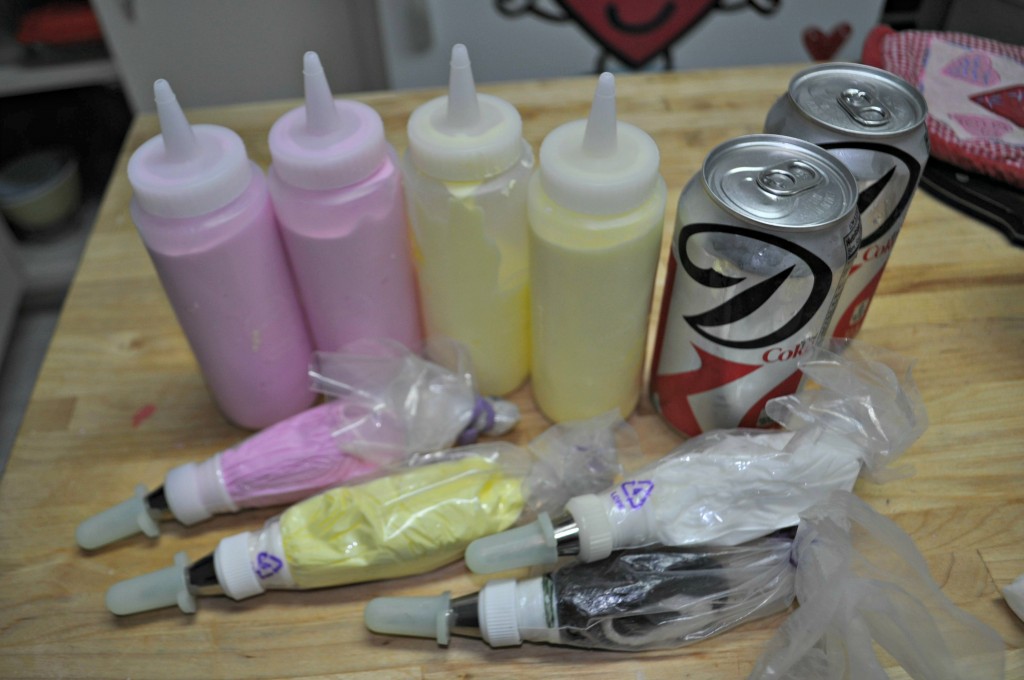
I use Royal Icing to decorate these My Little Pony cookies. The recipe I use can be found here. For this cookie we will need a purplish-pink, a deep yellow, and just a bit of white and black for the eyes.
If at all possible prepare the black icing a couple of days in advanced. I mix just a small amount of icing with Americolor Super Black. For this cookie I thinned the icing only slightly, to piping or writing consistency. The black icing is just right when it makes small peaks that fall over, yet hold their shape. Place in a disposable bag with a P.M.E 1.5 or a Wilton #1 tip.
White icing is very simple. Just thin out some of the royal also to writing or piping consistency. Icing should form soft peaks when lifted with a spoon. Place in a disposable piping bag with a P.M.E 1.5 or a Wilton #1 tip.
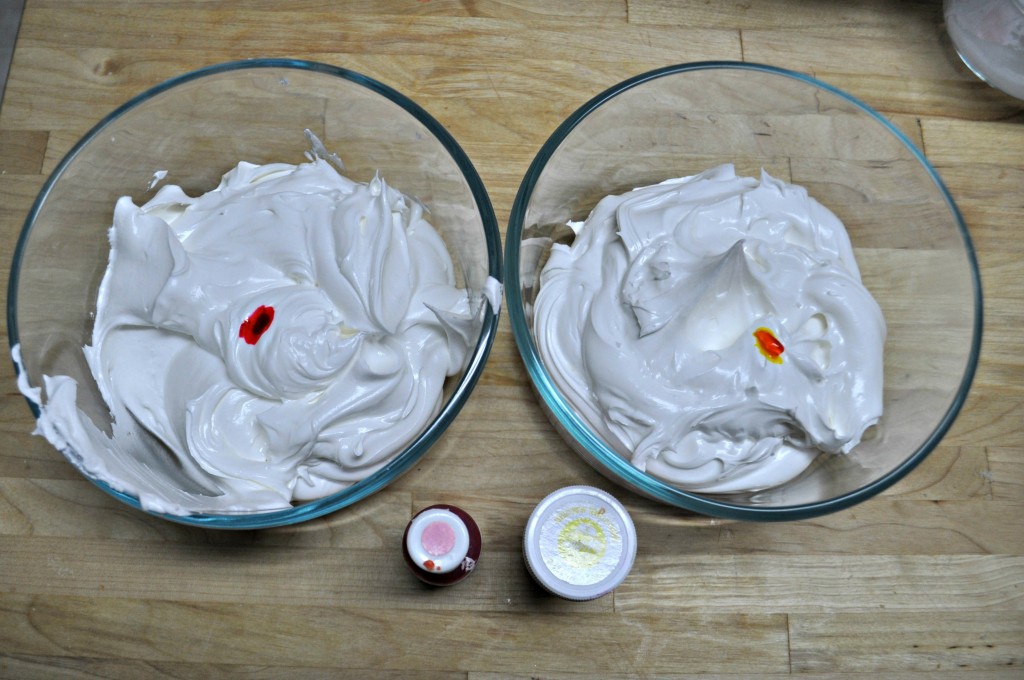
For the purplish pink icing I used two parts Americolor Deep pink to one part Wilton Violet. Use whatever pink and purple dyes that you have – again this is just a cookie – it does not have to be perfect. This will be used for Fluttershy’s hair. Thin some of this icing to piping or writing consistency and some of it for flooding the cookie. Icing for flooding should be like honey or corn syrup.
For the yellow icing I used Wilton Lemon Yellow. When mixing these colors I referred to the image of the My Little Pony to make sure my colors were close to the image. Be sure not to add to much dye. If that happens you can always tone down the color with more white royal icing. Again, you will need a thicker consistency icing for outlining and a thinner consistency for flooding the cookie. Think of a gel like toothpaste consistency for outlining and think of thick corn syrup for the consistency for flooding.
I am now ready to decorate the My Little Pony cookies. It is late so I will need a couple of Diet Cokes to help me with this job.
Step 4 – How to Make a My Little Pony Cookie – Decorate the cookie
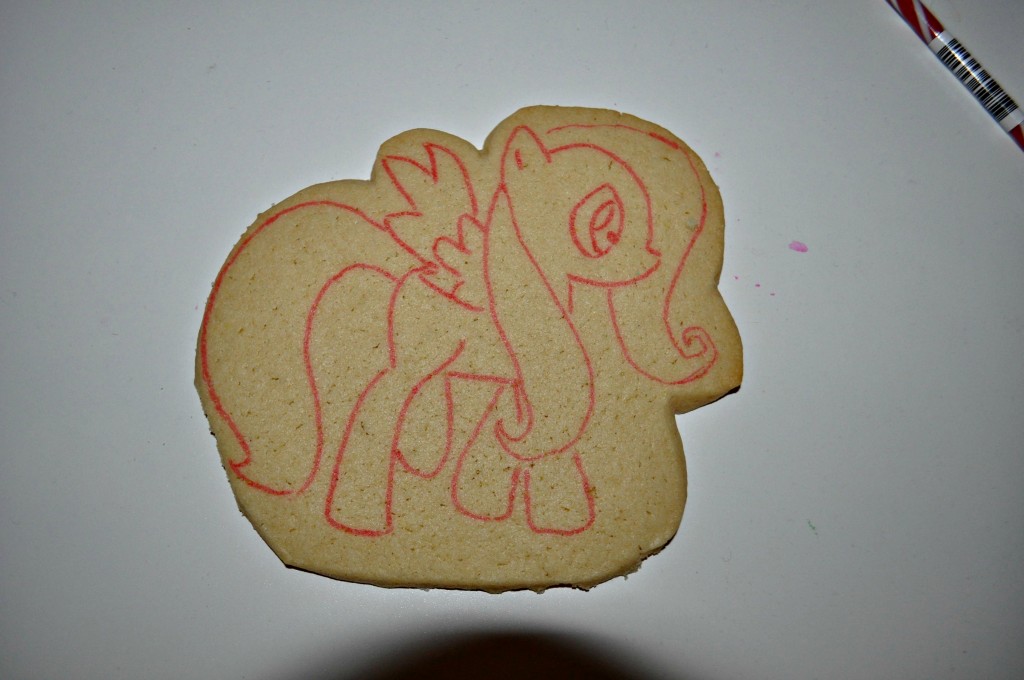
I start by outlining the My Little Pony on to the cookie. I use an edible ink marker to do this. I probably should have used a lighter color but this worked. I use my Kopykake 300xk projector to easily help me transfer the My Little Pony Image on to the cookie. If you do not have one carefully copy the image on to the cookie.
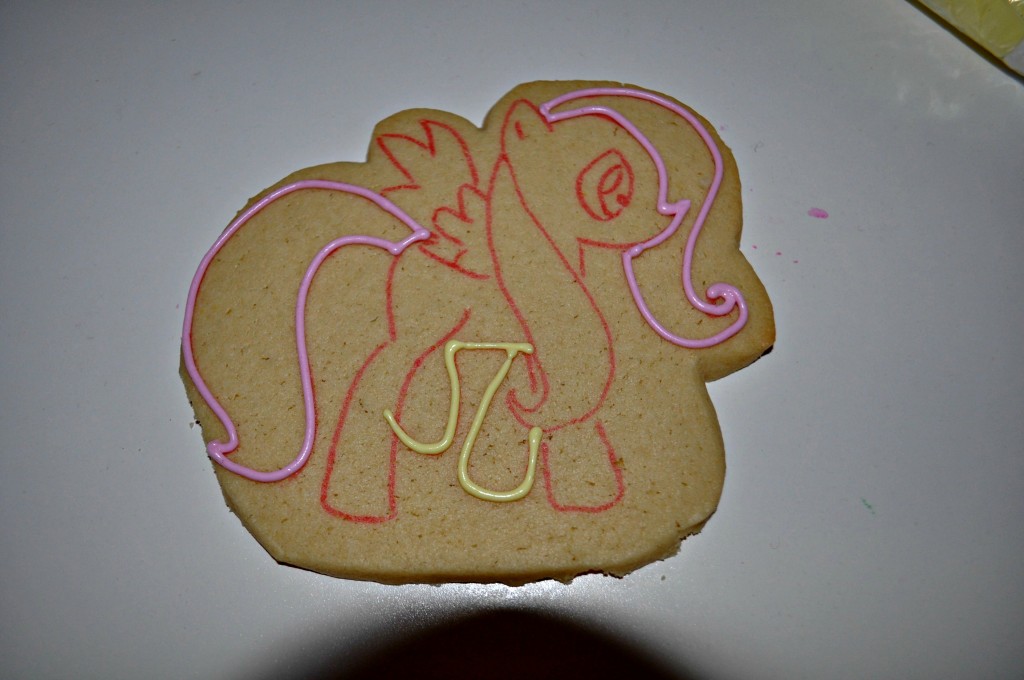
I will decorate this My Little Pony Cookie in layers, so that the cookie has a nice 3D look. In the photo above I am outlining the first layer, which includes the back legs, mane and tale of the My Little Pony Cookie.
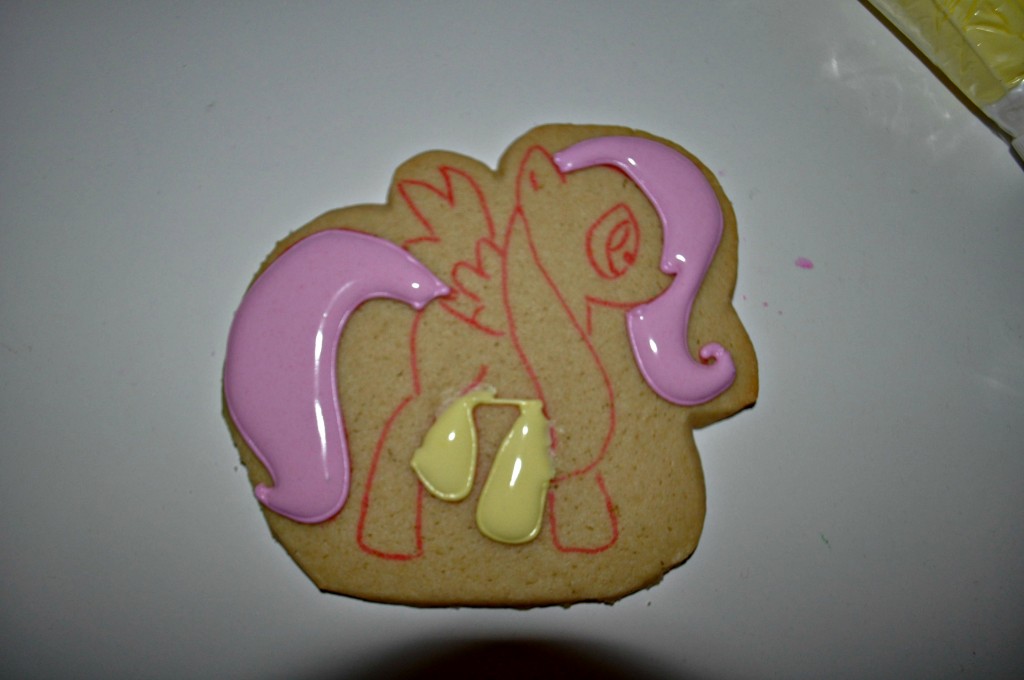
Using the plastic tubes with the thinner flooding icing I immediately fill in the sections. The legs do not have to be perfect because I will be adding more icing on top of those. Wait about 20 minutes, or until the icing sets to add the next layer. A fan, dehydrator or heat gun can make this go faster. I usually move onto another My Little Pony cookie.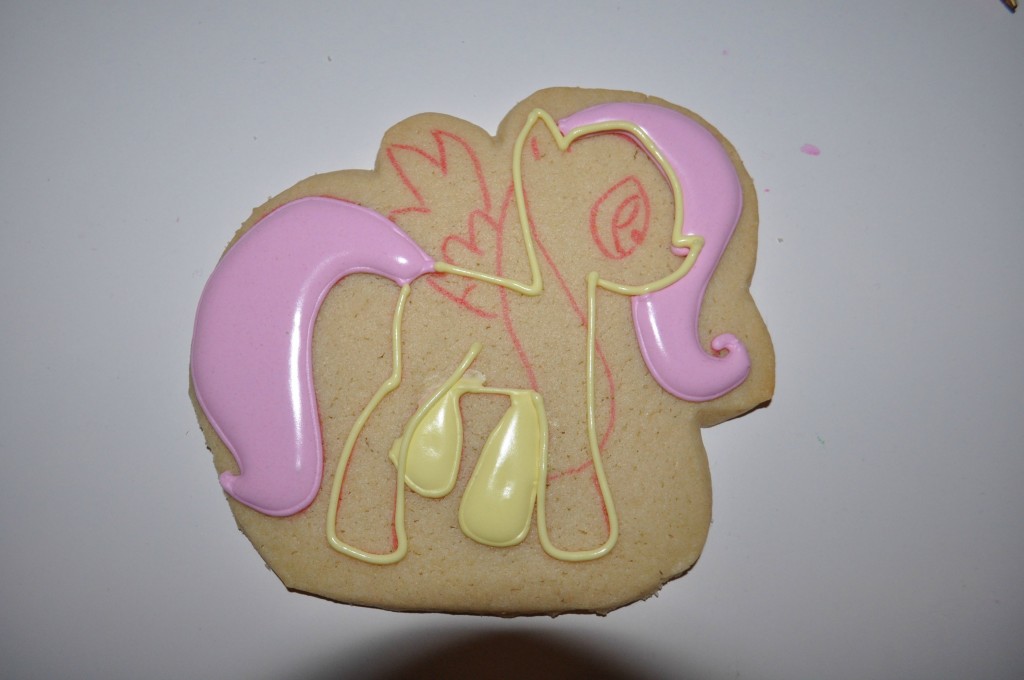 Now using the thicker icing outline the second layer, the main portion of the body. I am using a Wilton size 1 tip to outline the body of the My Little Pony cookie.
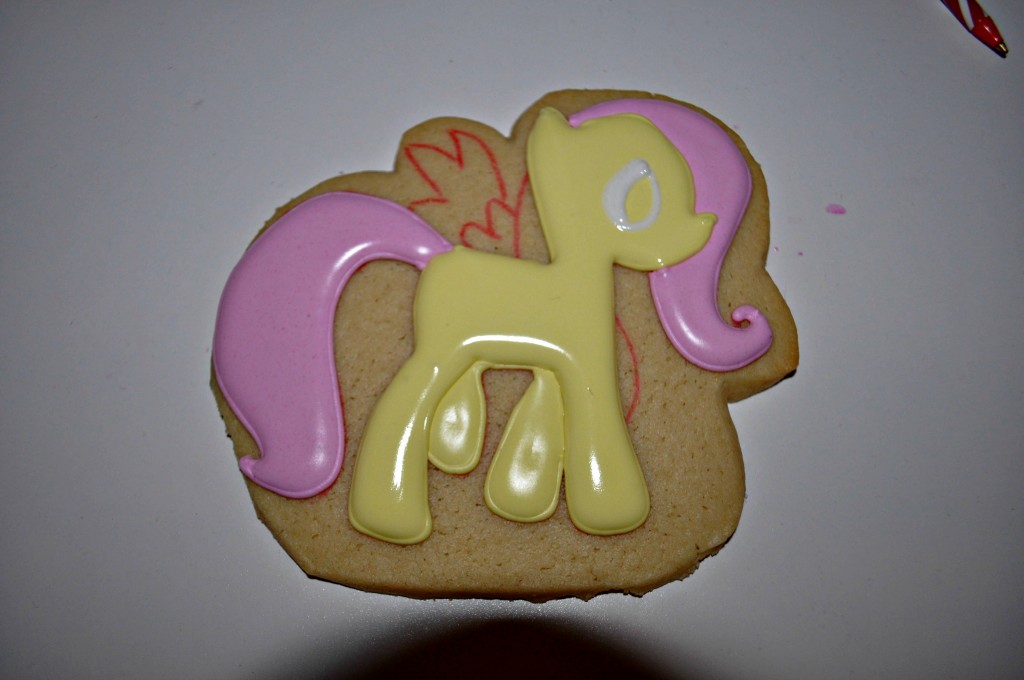 Flood the main body section of the My Little Pony cookie. Soon after flooding outline the eye area using the thick white royal icing. Leave an area of the white eye unfilled for the black portion of the eye.
 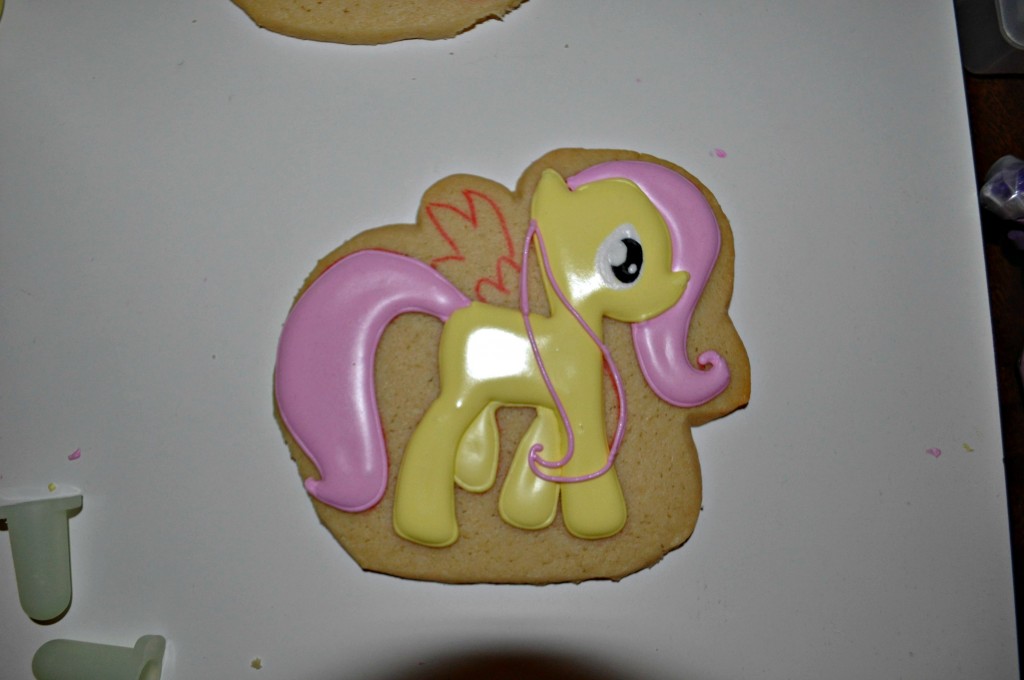 Add the black to the eye using the piping consistency black icing prepared earlier. Add the two white dots to make the eyes look just like the My Little Pony cartoon. After about 20 minutes I add the outline of the other side of the pony’s mane. Don’t you just love these late night decorating pictures?
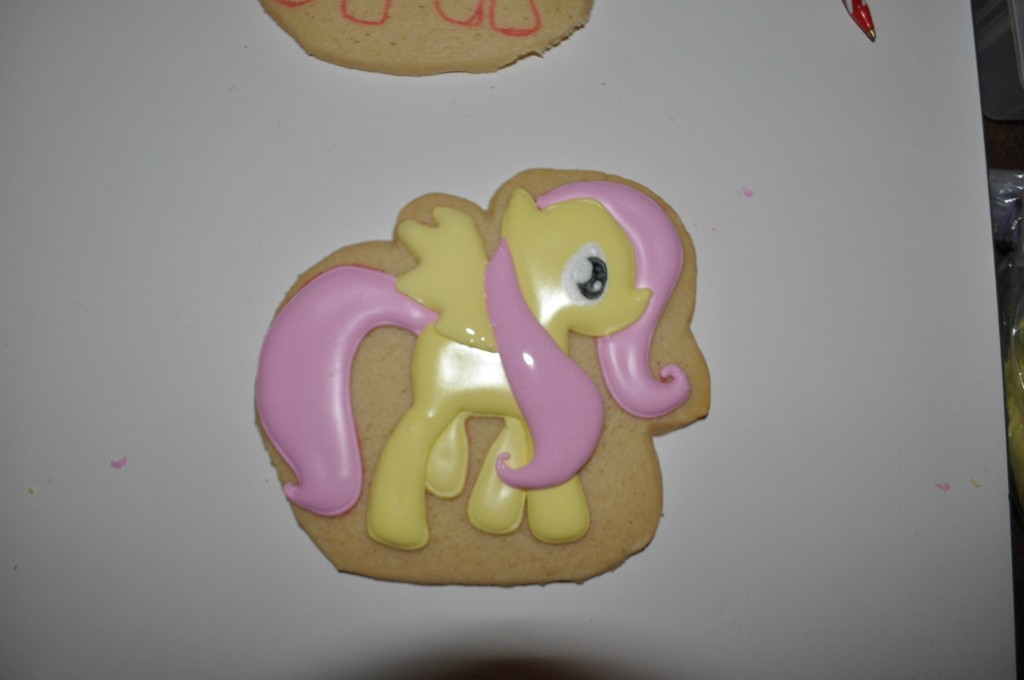 The My Little Pony cookie is almost finished! Fill in the mane with the pink royal icing, and outline and fill the last section of the cookie – the wing. At this point I let the cookie dry overnight before adding the final details.
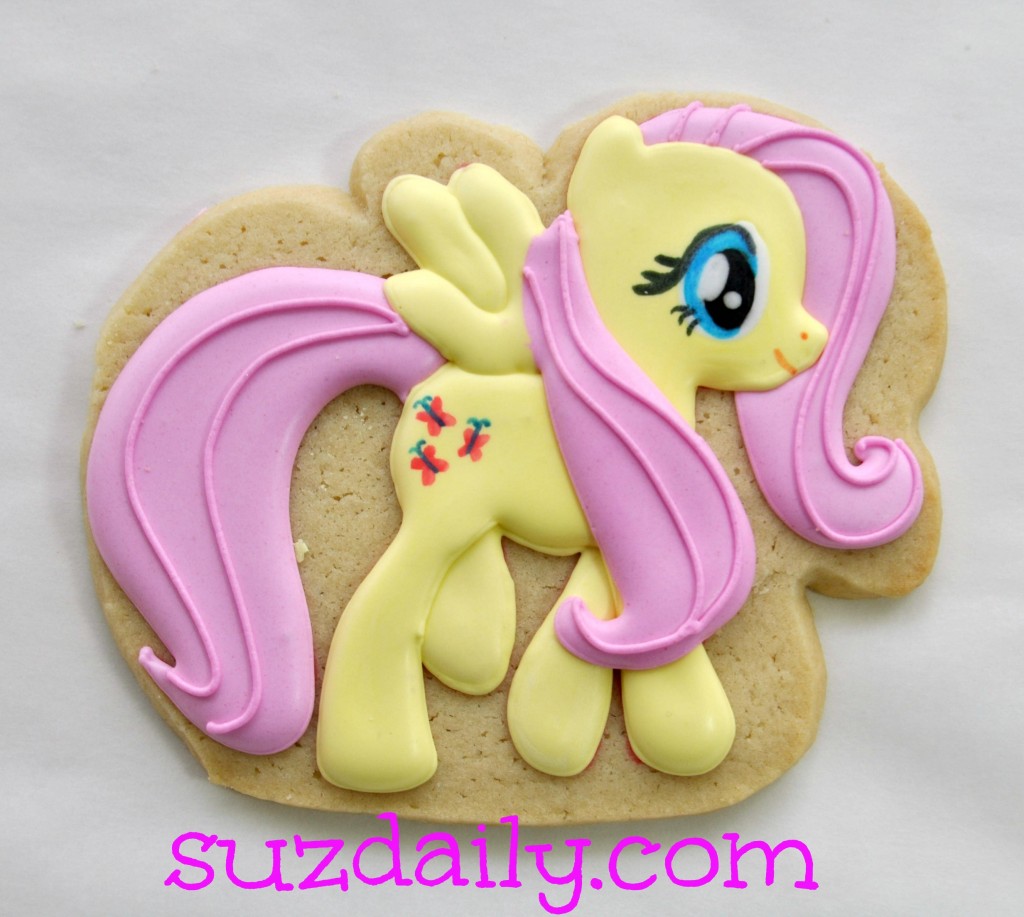 The next morning I added the final details to the My Little Pony cookie. As you can see above, I used the same pink icing to create lines in the pony’s mane and tail to give it a flowing look. I also added the three small butterflies using an edible ink marker. If you do not have edible ink markers you could use a food safe brush and a bit of food coloring mixed with water to paint on the details. I also added the blue to the eye and the eye lashes. An orange marker was used to give the nose and mouth details. I loved making these My Little Pony cookies. Happy Birthday Lily… what will your birthday theme be next year?


Fantastic cookie and tutorial! Thanks for sharing!
Thanks for looking! These were very fun to decorate!
Suzanne 🙂
awesome ! 🙂
Thank you!
🙂
Suz
my littlest is having a birthday! so thanks!
Good luck with the birthday party! How fun!
Suzanne
p.s. I have four girls and a boy too 🙂
So great! I made some with a friend a couple weeks ago & they were tough!
http://pinterest.com/pin/26458716533050924/
Not as professionally gorgeous as yours.
It is always fun to try something new! All that really matters is how they taste 😉
Thanks for looking!
Suzanne 🙂
Fabulous job!!! Love the little butterflies on the tushie!!!
Thanks for looking! I loved making these!
WOW!!! Thanks for sharing, you are so talented! 🙂
Thanks Amy!
Suzanne
These are adorable!!!
Thanks so much Anne! I”m glad you liked these.
Suzanne 🙂
I’m planning a birthday for my daughter and this is perfect! Thanks for sharing!
I am so glad this helps!
Thanks for looking!
Suzanne 🙂
amazing…great talent…may i know how big is that cookie?
The cookie was about 5 inches – larger than most that I make. There was so much detail I didn’t dare go smaller. Thanks for looking
Suz 🙂
Awesome cookies, thanks for sharing! When you decorated the cookies and then left them overnight before putting on the final details, did you put them in tupperware or something like that?
Heidi,
No I left them on a cookie sheet so that the royal icing could dry. I once covered them during the drying step and the icing was not dry enough to proceed to the next step. So I have found I have to keep them uncovered overnight. I thought at first they would end up stale but they are fine. I do this for all my cookies.
I hope this helps!
Happy Baking!
Suzanne 🙂
Thank you making my little pony next weekend. Have to make rainbaow dash. This is very helpful
I am so glad! Rainbow dash will be so cute – lots of color mixing!!! Have fun!
Beautiful! I could never do icing like this. Also, it would kinda be as if you were EATING Fluttershy……….why would you eat a cute little pony? These cookies are too beautiful to eat anyway!
Sophie – I’m glad you like these cookies! I know, I was not able to eat these but the little kids at the birthday party loved them! With practice you can get the icing right… but then you may have to take a bite out of Fluttershy. 😉
Thanks for looking!
Suzanne 🙂
I’m so glad I came across this tutorial. I’m working on some MLP cookies at the end of this month, and this will help me work out my timeframe. Yours turned out amazing!
Amy – I am so glad this will help! I only made 6 of the my little pony cookies then did coordinating flowers because the cookies took so long. I was happy with how they turned out. We even put one of them on the birthday cake. It looked adorable!
Thanks for looking!
Suzanne 🙂
Hi! When you outline the cookies, do you guess where they go or somehow trace the image?
Hi, when I am outlining I use a kopykake – it’s a projector used for transferring images onto cakes or cookies. If you do not have one you could make a template on your own and trace the pattern onto the cookie. I would make one of the entire my little pony, then print out an extra template and cut it into sections for the decorating. Does that make any sense?
Thanks for looking!
Suzanne
Hi there ,I was wondering if you sell those cookies you make ?
I do sell some designs, if interested you can contact me through my facebook page
http://www.facebook.com/sweetsbysuz
Thanks! Suzanne
THESE ARE AWESOME!!! I make cookies for everything. This year my 3 yr old soon to be 4 wants My little Pony theme party…So I am going to give it a whirl! your steps are well documented and images really help as well.. Thank you so much for posting!
Best,
Michelle
Michelle,
I’m so glad this will help! These were fun to make – but I am happy I only made six then made several coordinating flowers to go with them! Let me know how it goes!
Suzanne 🙂
Great looking cookies! I cannot wait till I get a bit of free time away from decorating cakes to have a go at doing these. Thanks for posting the tutorial! xx
I need more free time too!!! I wish I had more time for cakes, cookies, all desserts. And I wish they all had zero calories!
Thanks for looking! Let me know when you make these!
Suzanne 🙂
Thanks for the great tutorial! Always helps to have pointers when doing a cake/cookies from just a photo.
Lesa, I’m so glad you liked this. It takes so long to figure out how to do a design that I like to blog it (if there is time) for anyone else and so that I don’t forget how to make it the next time!
Thanks! Suzanne 🙂
This will be so helpful for my daughter’s My Little Pony party in April.. Thanks so much for sharing!
Best of luck with the party! they are a lot of work so make sure to have some simple cookies to go with these!
Thanks for looking!
Suzanne 🙂
Thank you so much for this tutorial!!!!!! I think you’ve saved my life. My soon to be 4 year old niece wants 10 different ponies on her cake. This just saved me!!!
Thank you again!
I’m so glad it helped out!
Suzanne 🙂