How to make an Elephant Cookie
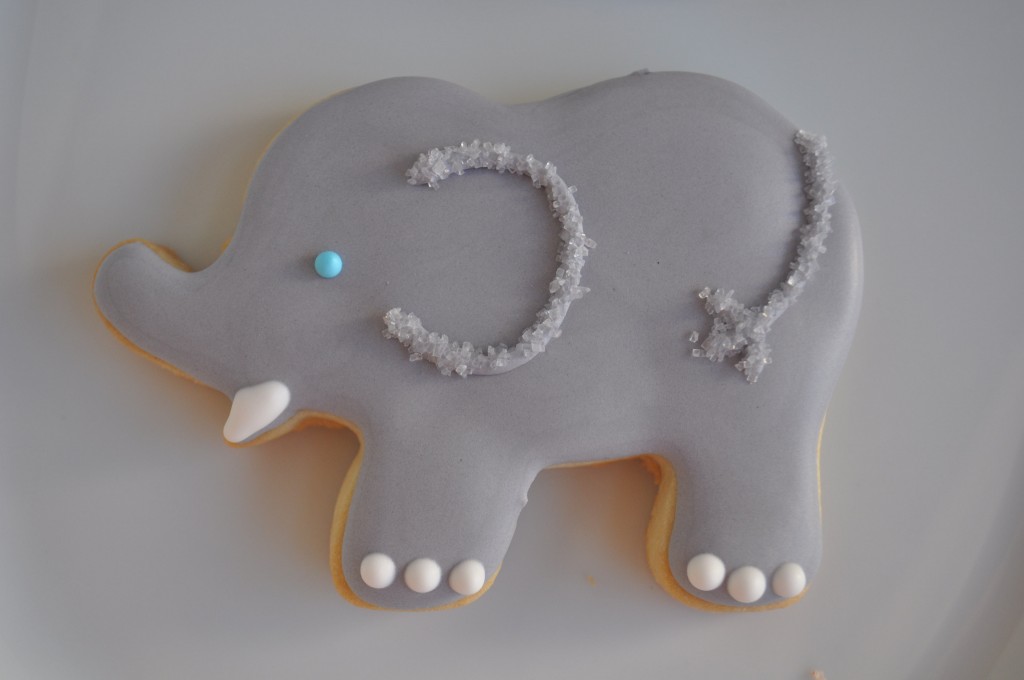
I was asked to make some zoo themed cookies for a baby shower and here are some of the elephants I made. I love the simplicity of these. Of all the animals I did, I think the elephant was my favorite.
For more details on this project keep reading.What you will need to make this cute elephant cookie:
- Elephant Cookie cutter (the one I used came from the Wilton set with 50 animals)
- Sugar Cookie Dough
- Royal Icing
- Black dye (either Americolor Super Black or Wilton Black)
- Blue dye (I used Americolor Sky Blue)
- White sanding sugar
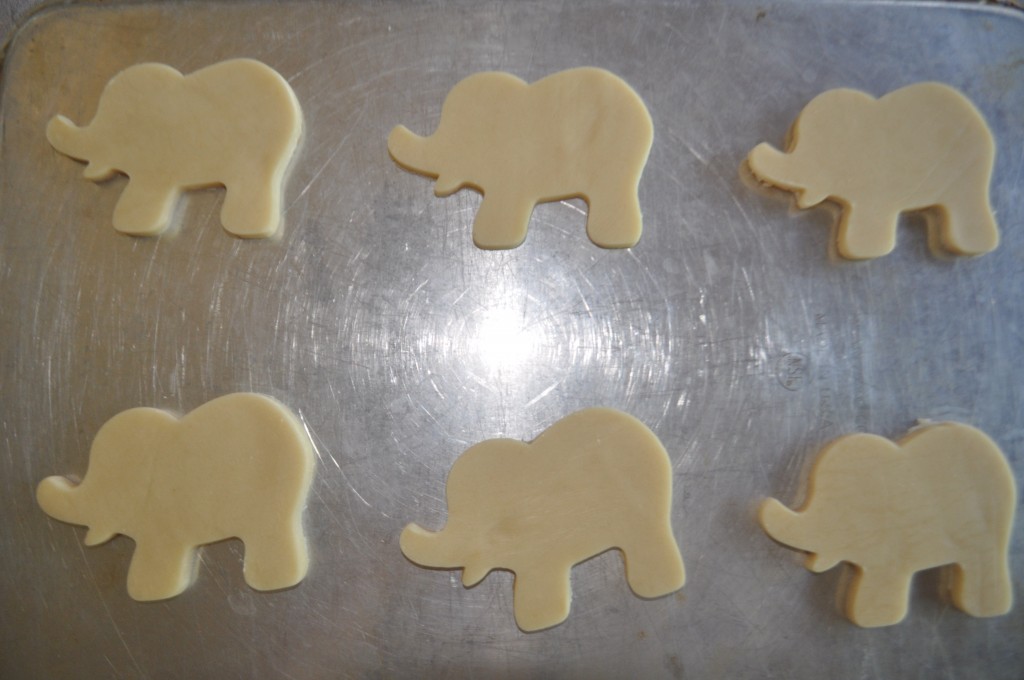
To start, prepare cookie dough. For these very specific shapes I rolled the dough 1/4 inch thick between two sheets of saran wrap and chilled the dough for at least two hours. I also chill the baking sheets while the dough is chilling. This keeps everything chilled so the dough does not spread and ruin the elephant shape.
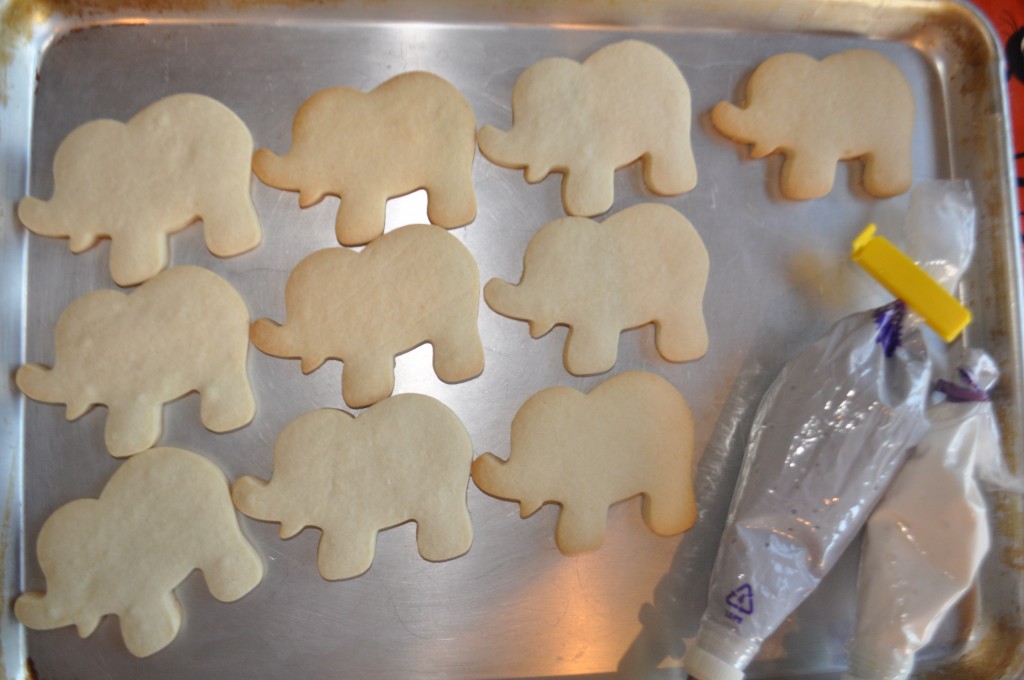
Following a tip from Julia Usher, I am baking these elephant sugar cookies on the back of the cookie sheet. This leads to even baking of the cookies. I have also found I have less spreading when the pan is chilled and when I don’t use a silicon mat. Because of the high butter content it is easy to remove these elephant cookies from the baking sheet.
The elephant cookies are baked and cooled. I now continue by preparing the royal icing. Just the smallest bit of black dye creates the grey color needed for the elephants. Be sure to add just a little bit of dye – you can always add more later. I also kept some of the icing white for the details. I am using just one consistency icing. I normally outline and flood, but in this case I decided to make a medium thick icing. I thinned the royal icing and added just a few drops of water at a time. I knew the icing was ready when I placed a knife through the icing, making an indentation, then counting for 10 seconds. If the indentation is gone after 10 seconds the icing is just where I want it to be.
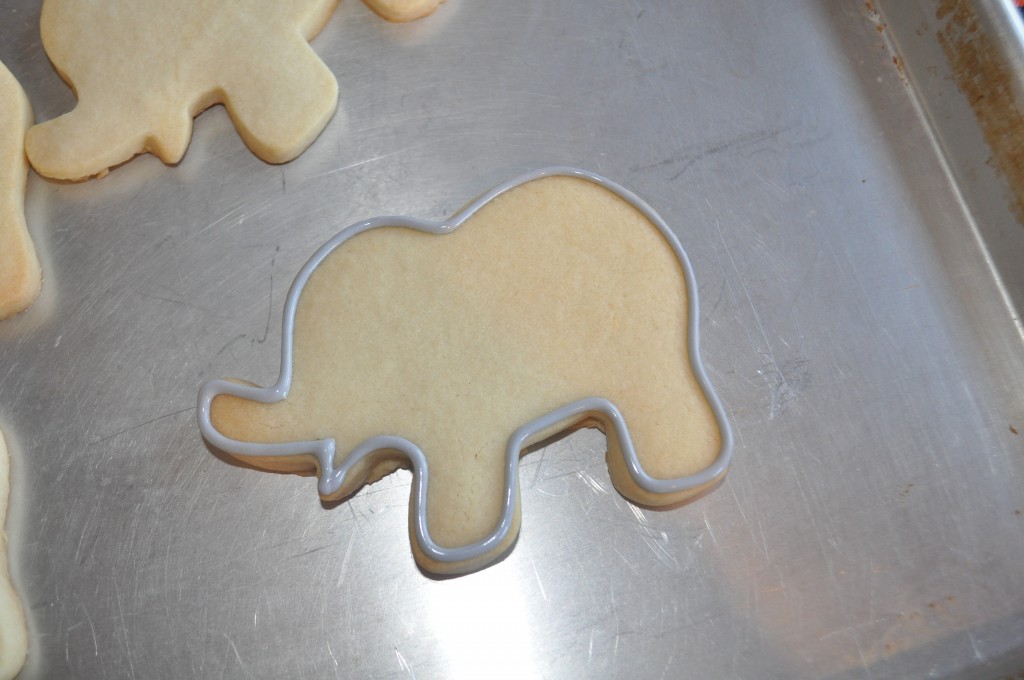
Outline the cookie using a Wilton #2 tip. If the icing is right it will fall gently on to the elephant cookie. If it is too thick it will twist and turn as it comes out of the piping tip. If it is too thin, it will run off the cookie.
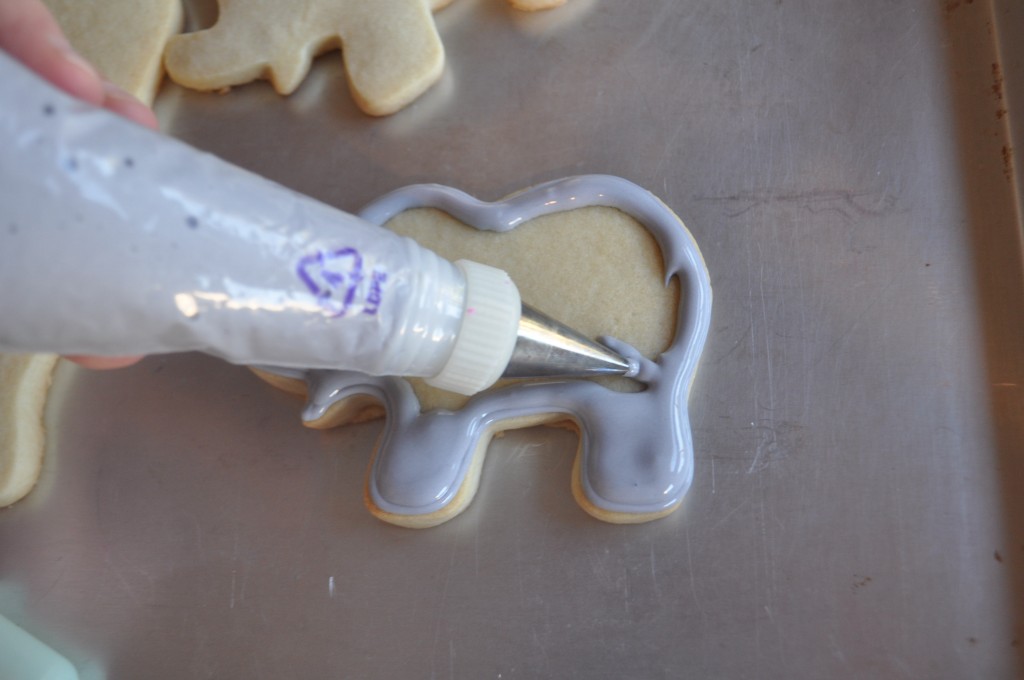
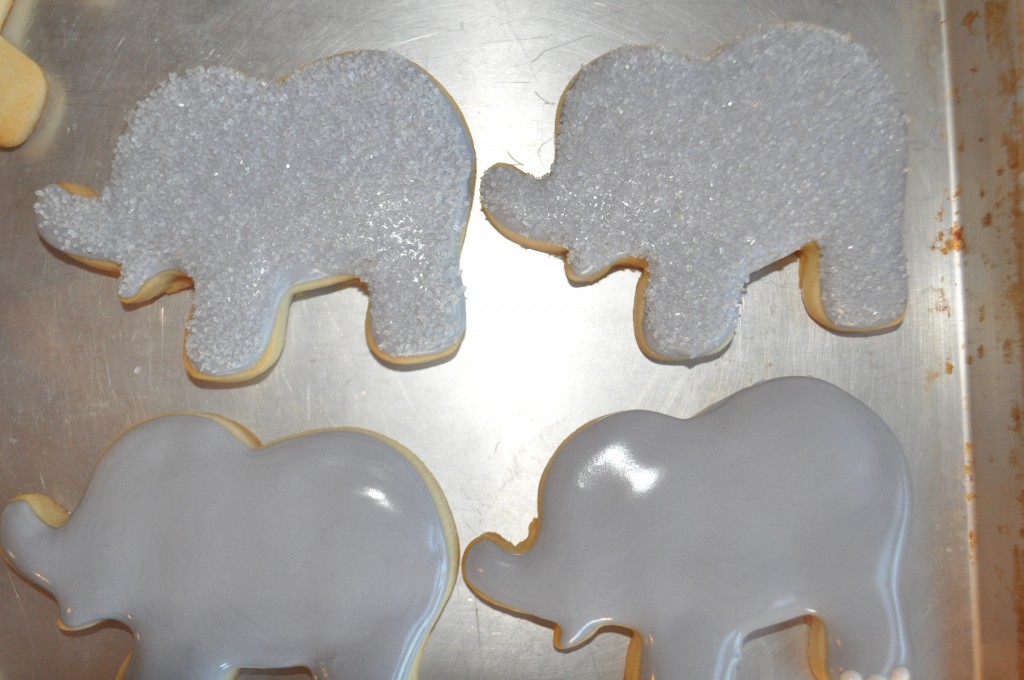
Immediately after the elephant cookie is outlined, fill in using the same icing. If you do not want to see the border use a toothpick to mix it into the icing used for a filling. To make the process go faster remove the Wilton size 2 tip and replace with a larger Wilton size 3 tip.
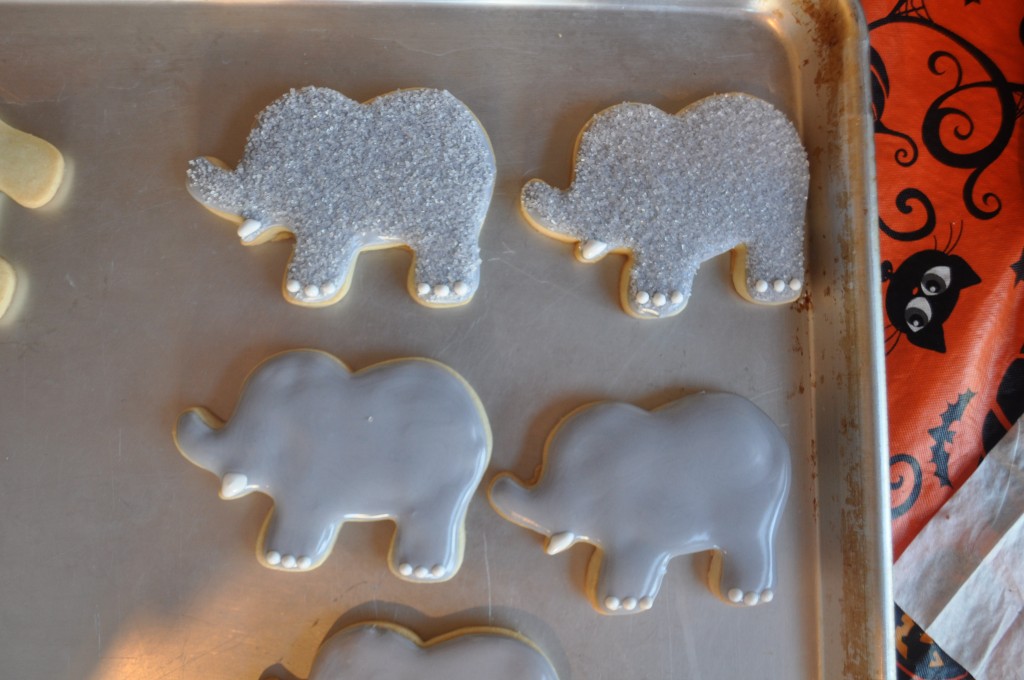
The two elephant cookies on the bottom have been filled in. For the two cookies above I am going for a different flavor and texture cookie. Those cookies were sprinkled with sanding sugar. At this point allow the cookies to dry for about 10 minutes. Use the white icing to add the dots to the feet of the elephant and the small tusk.
Now the first layer of details has been added and the cookies will dry over night.
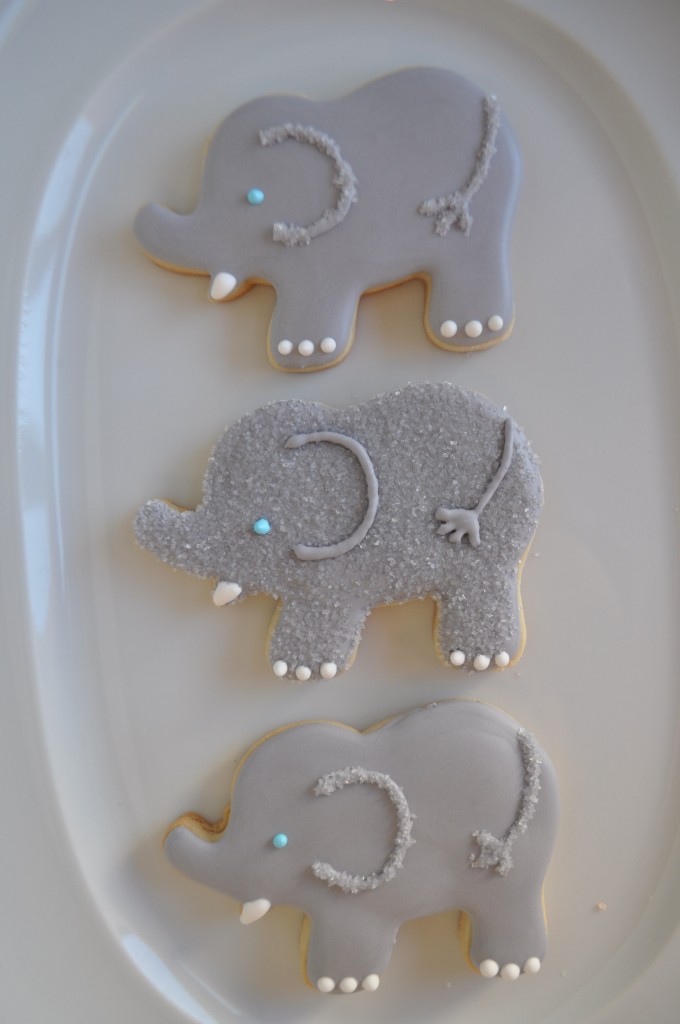
The next day, add the ear, making a backwards “C” shape and the tail. Sprinkle with sanding sugar. Add the light blue eye. Allow this to dry another hour and the cookie should be ready for packaging.
For the elephant covered in sanding sugar, add the Ear and tail and leave them plain.
These cute elephant cookies would be great for a baby shower, birthday party, or a circus party. I can’t wait to have an excuse to make them again.



think your elephants are darling, I’m giving a baby shower elephants & giraffes. Would you be able to bake 60 of each and how much would they cost? Shower on June1, 2013, in California. Thank you for your ideas, they’re great!
Yolanda, I sent you an email but didn’t hear back.
Best wishes and thanks for looking!
Suzanne 🙂
Hi,
These elephant cookies are so adorable!! I would love these for my baby shower.. do you by any chance take orders?
Thanks!
Kirsten
Kirsten,
Yes, I do take orders. If you are still interested could you please send me a message through my facebook page.
https://www.facebook.com/sweetsbysuz
Thanks so much!
Suzanne