How to Make a Checkerboard Cake
Checkboard Cake
- 1 chocolate cake mix
- 3 eggs
- 1 cup (8 oz) sour cream
- 1/4 cup water
- ½ cup (one stick) butter melted.
Preheat oven to 350F. Follow box instructions, except use sour cream in place of one cup of water, and use melted butter in place of oil. Beat for 2 minutes until well blended and smooth. Some small lumps will remain. Line baking sheet with parchment paper and cooking spray. This is very important because the cake needs to be removed without breaking. Bake using two, 9 inch round pan for 15-18 minutes, or until a toothpick inserted in the center of the cake comes out clean. Try to put an equal amount of batter (about 2 cups) in each pan. Leave in the pan for a few minutes so the cake has time to set up. Start preparing the white or yellow cake mix. Any cake mixes can be used, as long as the colors contrast. I have seen cakes where the white cake is dyed a particular color.
- 1 yellow or white cake mix
- 3 eggs
- 1 cup (8 oz) sour cream
- 1/4 cup water
- ½ cup (one stick) butter melted.
Cook yellow or white cake mixes as outlined above. Line the 9 inch pans with more parchment paper and spray with cooking spray so it is easy to remove the cakes. Again, allow the cake to rest in the pan for a few minutes, then carefully transfer to a cooling rack. (I lost 2 cakes during this step but did not give up on the checkboard cake and just made more).
Keep reading!! This is a fun post…
- cardboard, cut into a 9 inch circle
- Two bowls, cups or cutters – one measuring 6 inches, one measuring 3 inches.
- Buttercream Icing. The recipe is found here. Make 2 batches.
Cut out a 9 inch circle out of heavy cardboard and cover in aluminum foil. This will be used as the base of the cake. Prepare buttercream icing. If two batches are prepared there will be some left-over. It is better to make extra then to have to stop everything to make more during assembly. Now you will have 4 rounds, 2 chocolate and 2 yellow (or any other contrasting color combination).
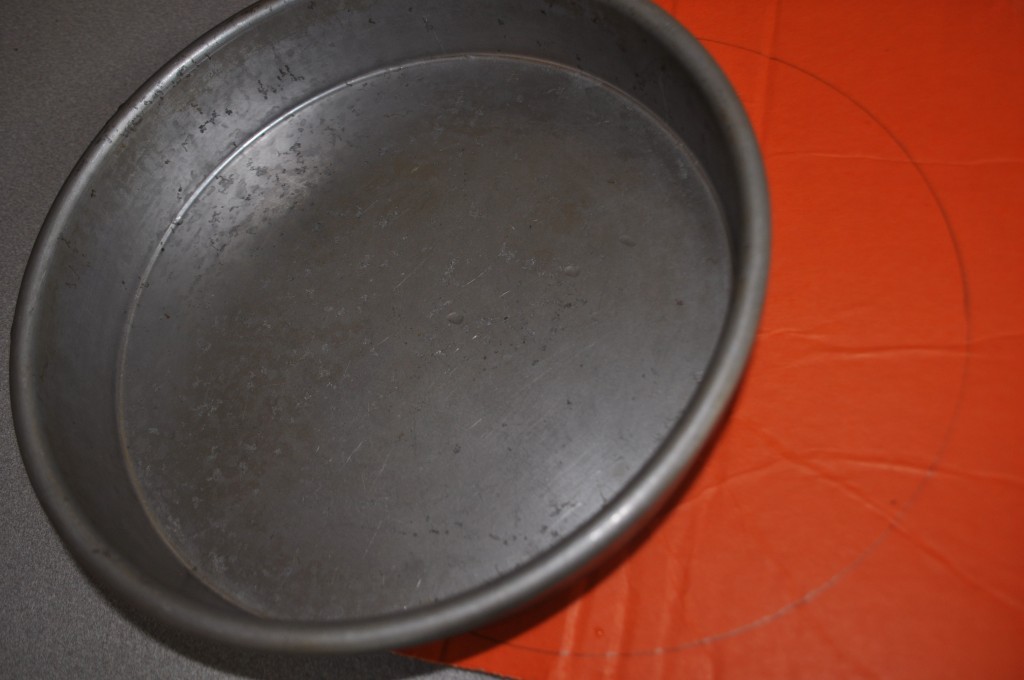
Use your pan as a guide to make a cardboard round. Do the same to cut the parchment paper the exact size needed.
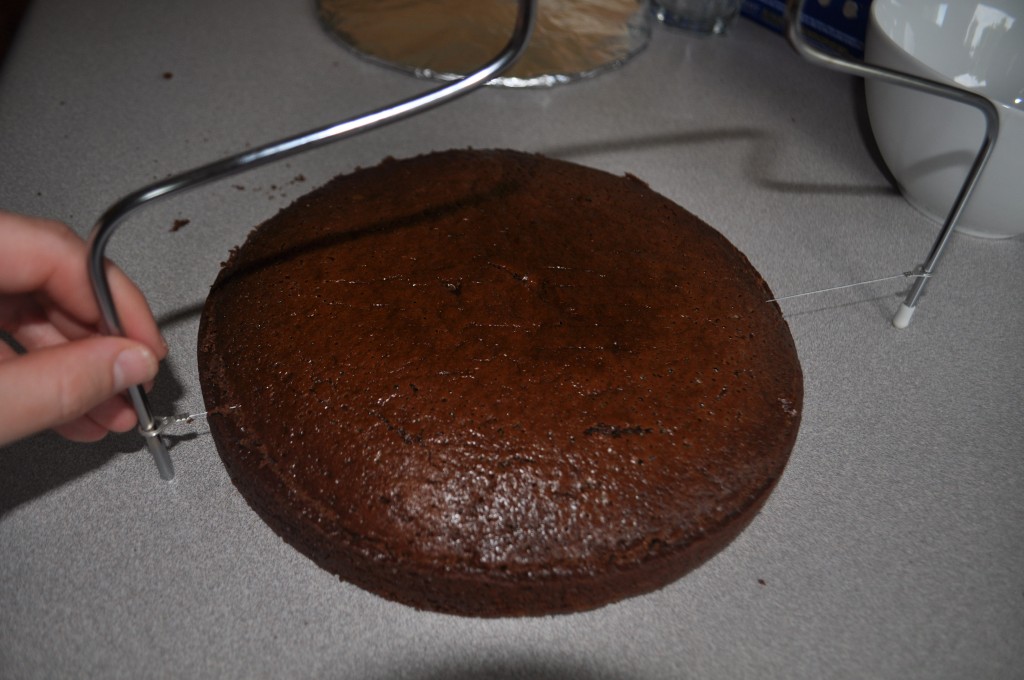
Use a cake leveler to make each layer even. My cakes were far from perfect, but they ended up about one inch high each.
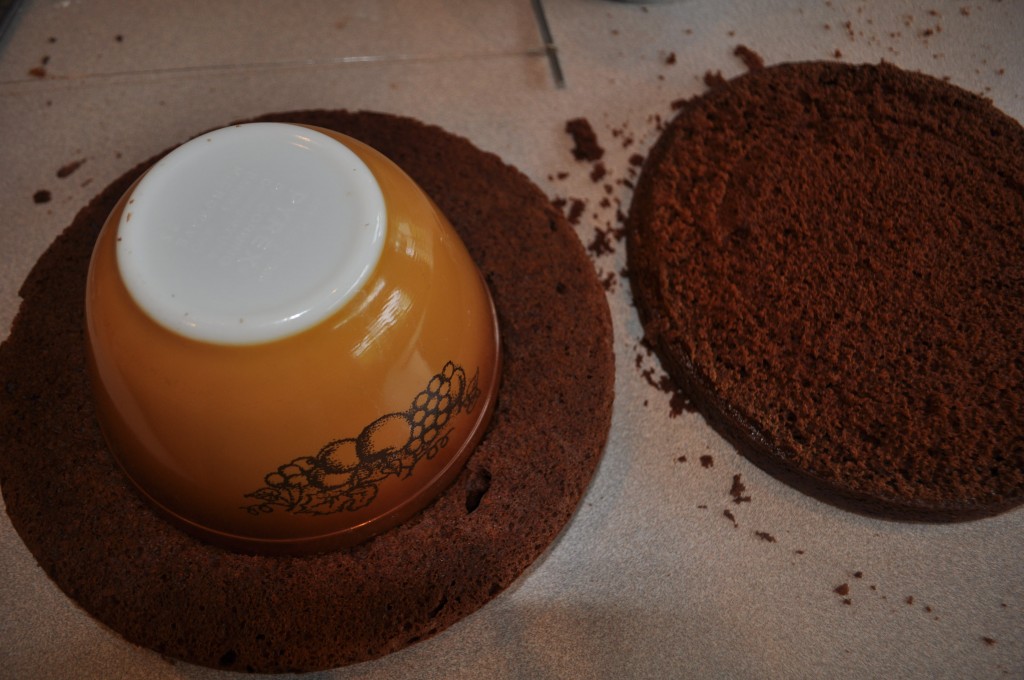
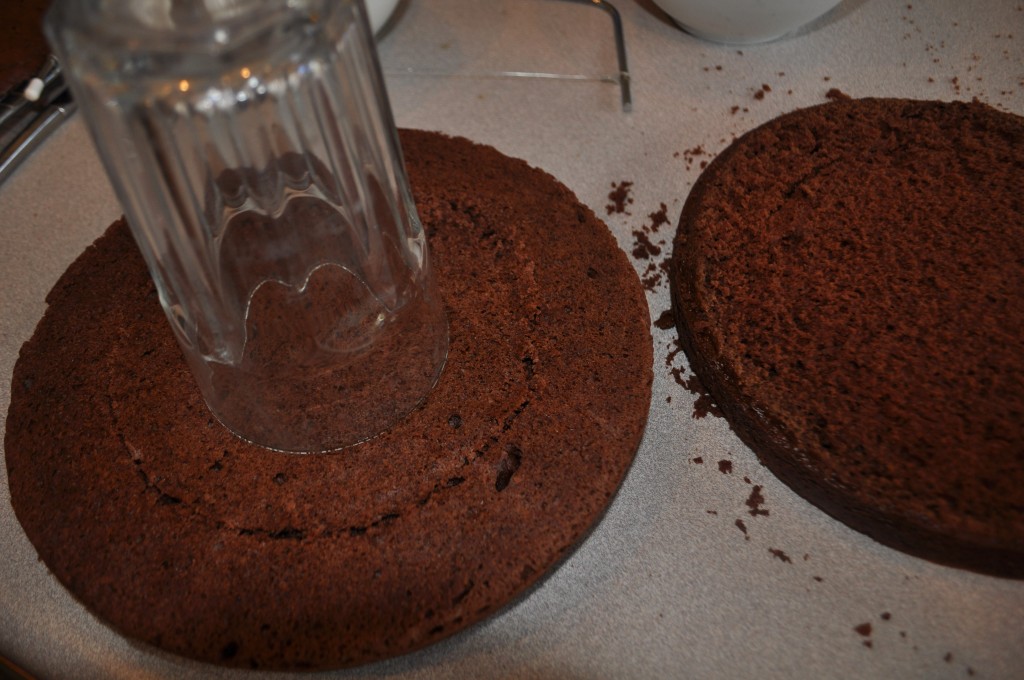
Find a bowl that measures close to 6 inches in diameter. The one I used measured 6 1/4 inches and was fine. Using the bowl as a guide, make a 6 inch diameter circle centered on each cake layer.
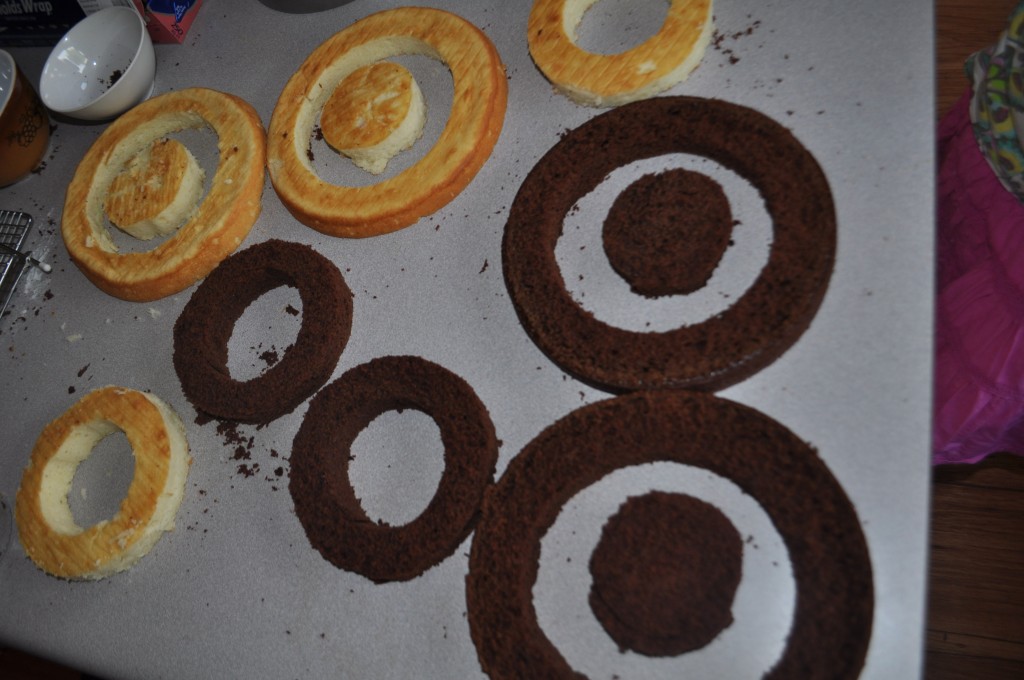
Find a cup that measures 3 inches in diameter (I could only find one that measured 3 1/4 inches). Next, centered within the 6 inch diameter circle, use the cup as a guide to cut a 3 inch diameter circle out of each cake flat.
Carefully, ever so carefully take apart the circles. Can you see where I’m going with this? It makes me want to go shopping at a certain store.
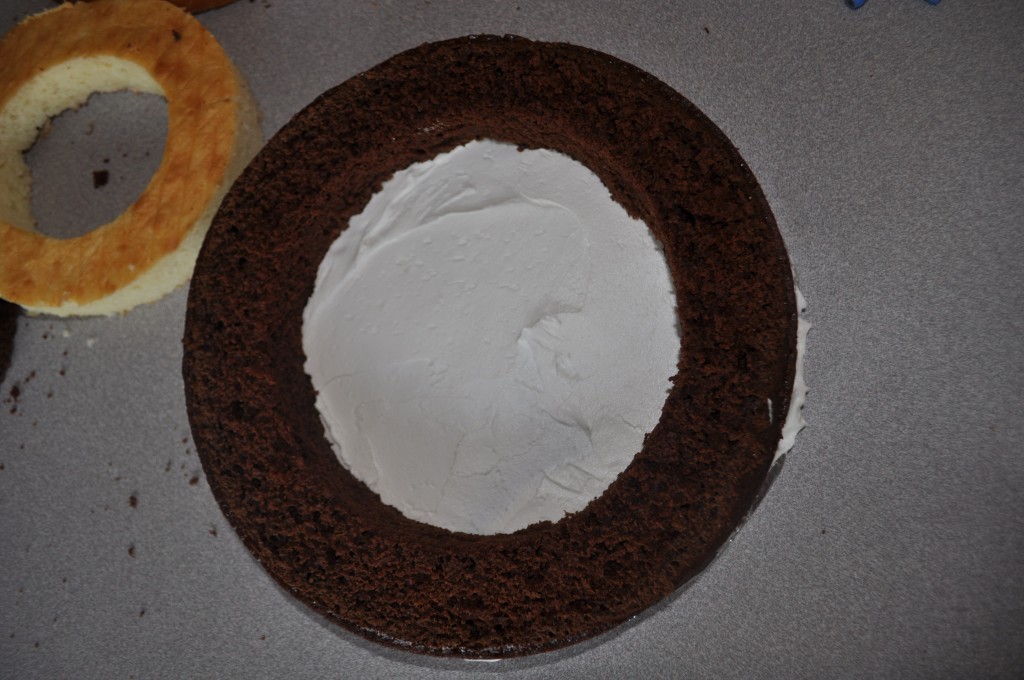
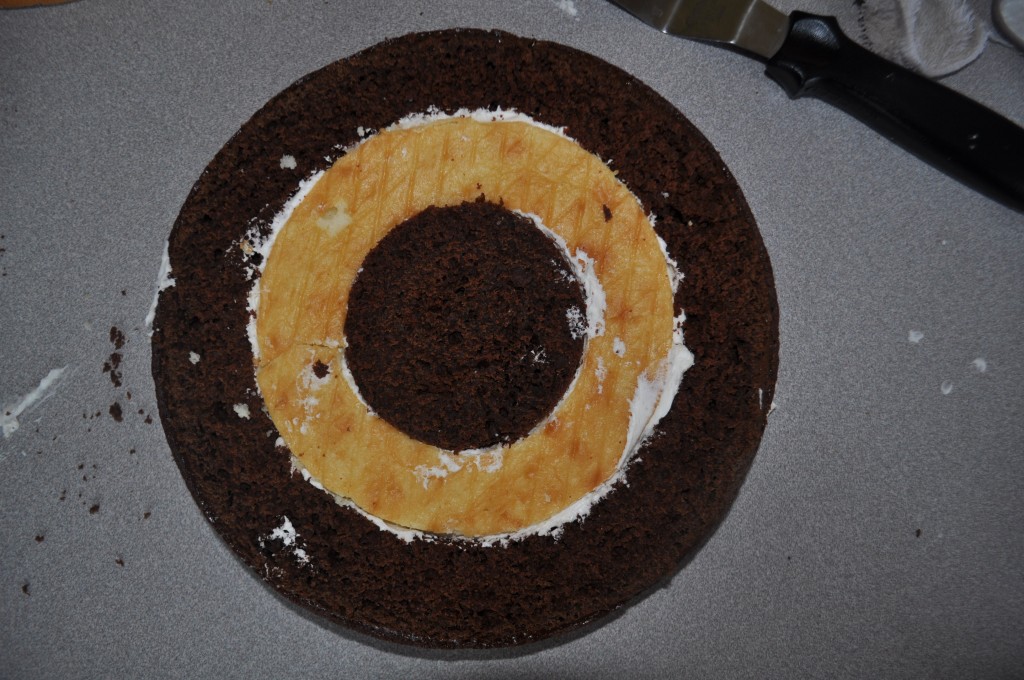
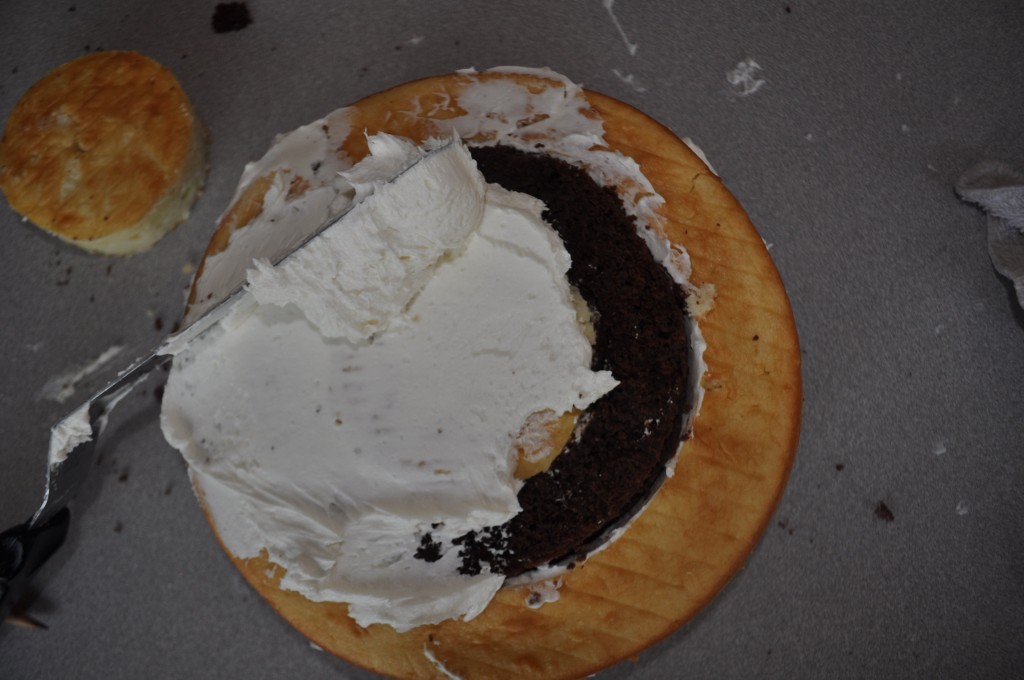
Start assembling the cake. Use the cardboard round covered in aluminum paper. Put a layer of frosting down on the base, then the first outer circle. Line the inside of each circle with frosting. This helps each circle to stick together.
Now carefully place the 6 inch circle inside of the 9 inch circle. These pieces will be very fragile so handle with care. Use a large spatula or whatever you can to help transfer the cake without breaking the sections.
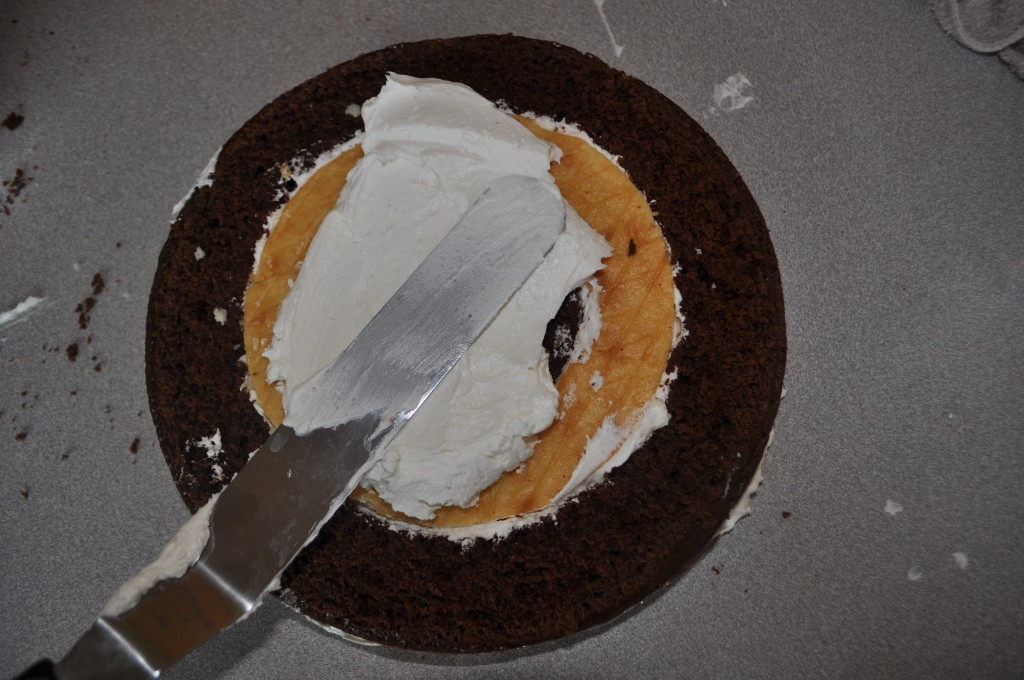
Add more frosting around the inside six-inch circle and then carefully place the three-inch circle inside of the former cake section. The bottom layer is almost ready.
Now add a layer of icing. Try to use the icing to fill in any gaps and make the three sections the same height.
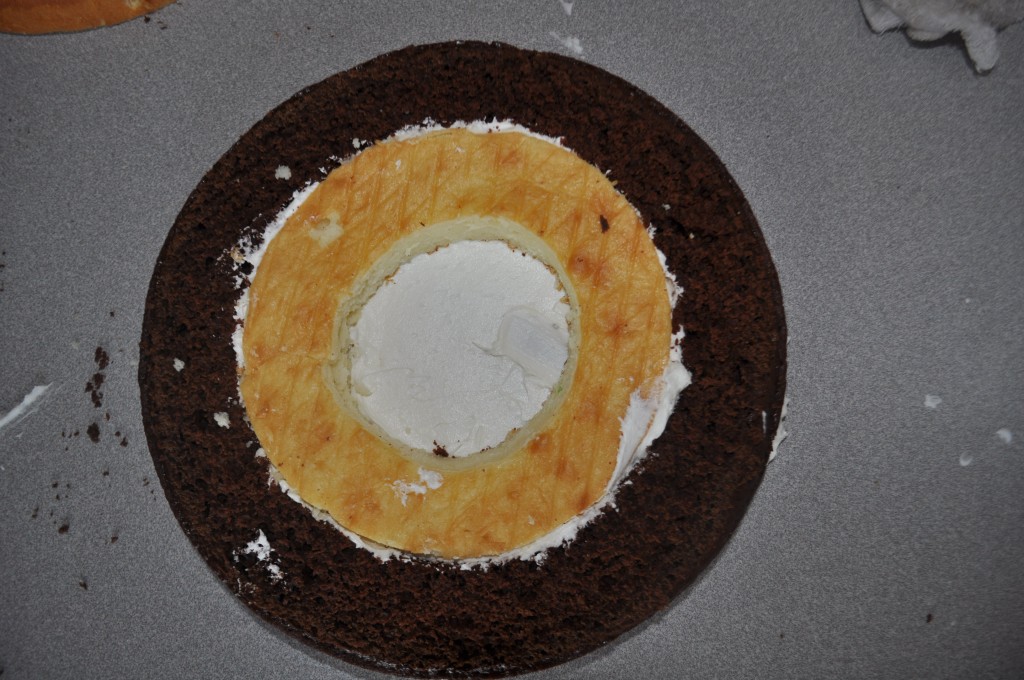
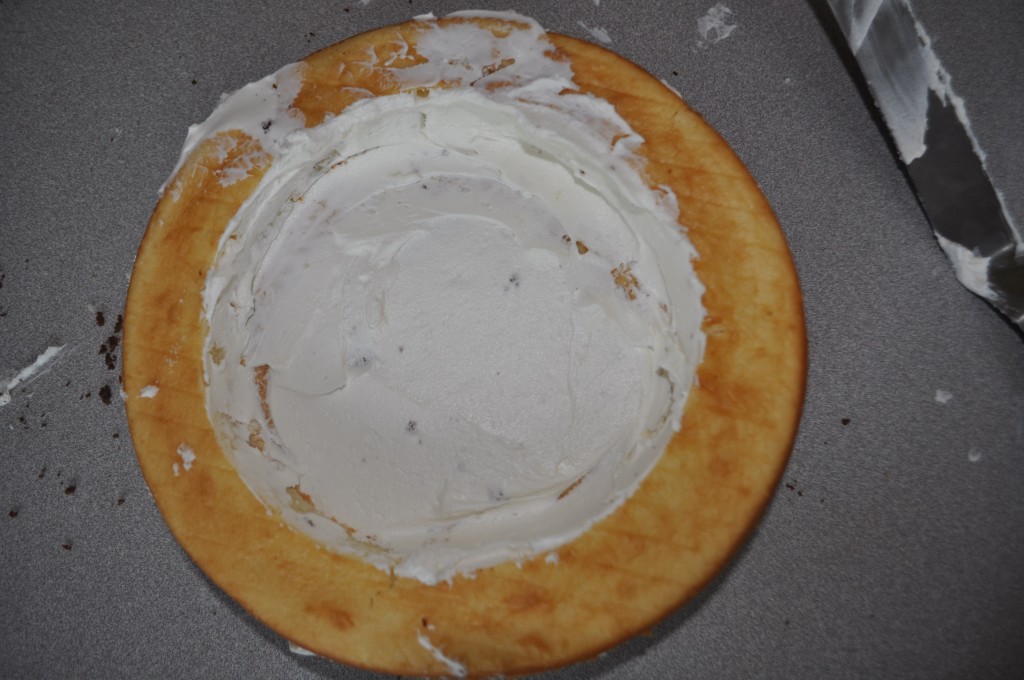
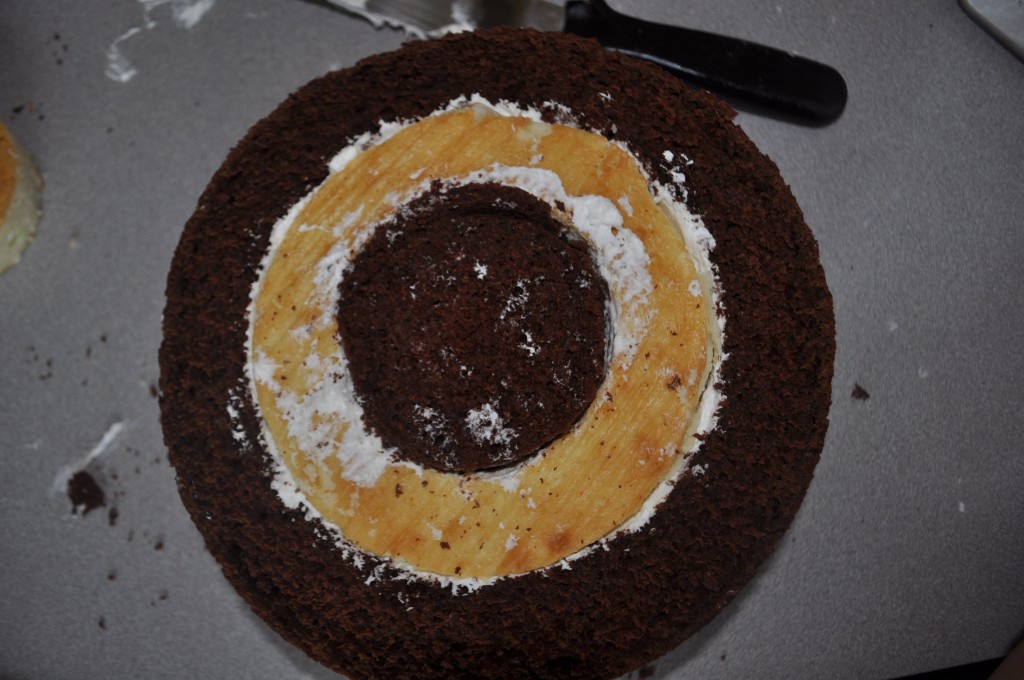
Begin Assembling the second layer of the cake directly on top of the first layer. Instead of chocolate-yellow-chocolate the opposite will be put together; yellow-chocolate – yellow. Add icing along the edges of the 9-inch section in preparation for the chocolate ring that will go inside.
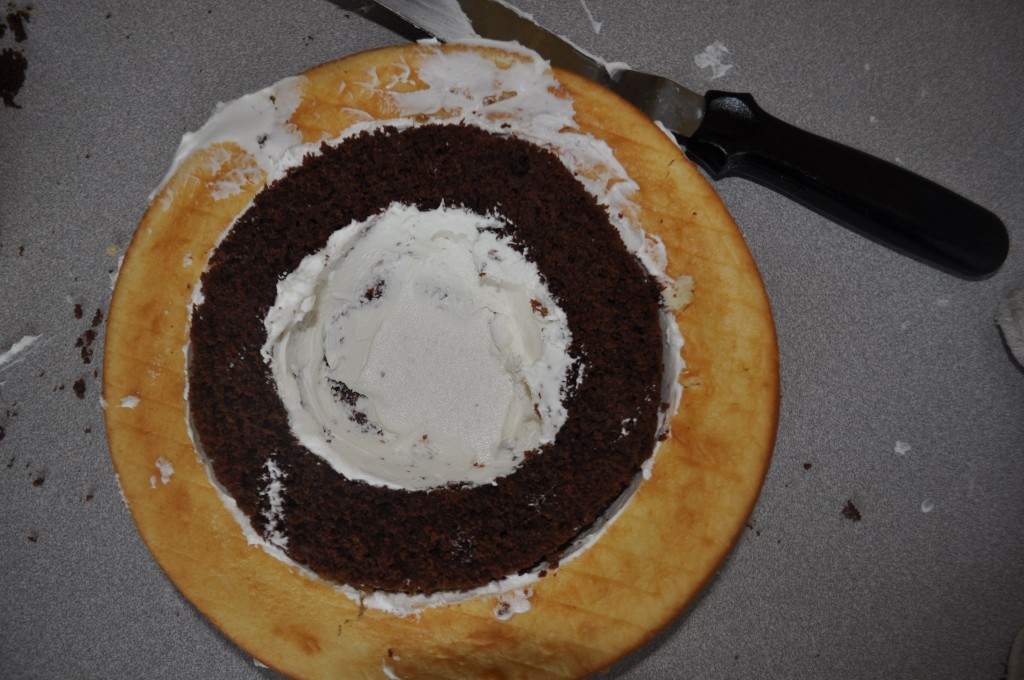
Insert the 6-inch chocolate ring inside of the large yellow cake ring. Frost the insides in preparation for the small 3-inch peice of yellow cake that will go inside of the chocolate one.
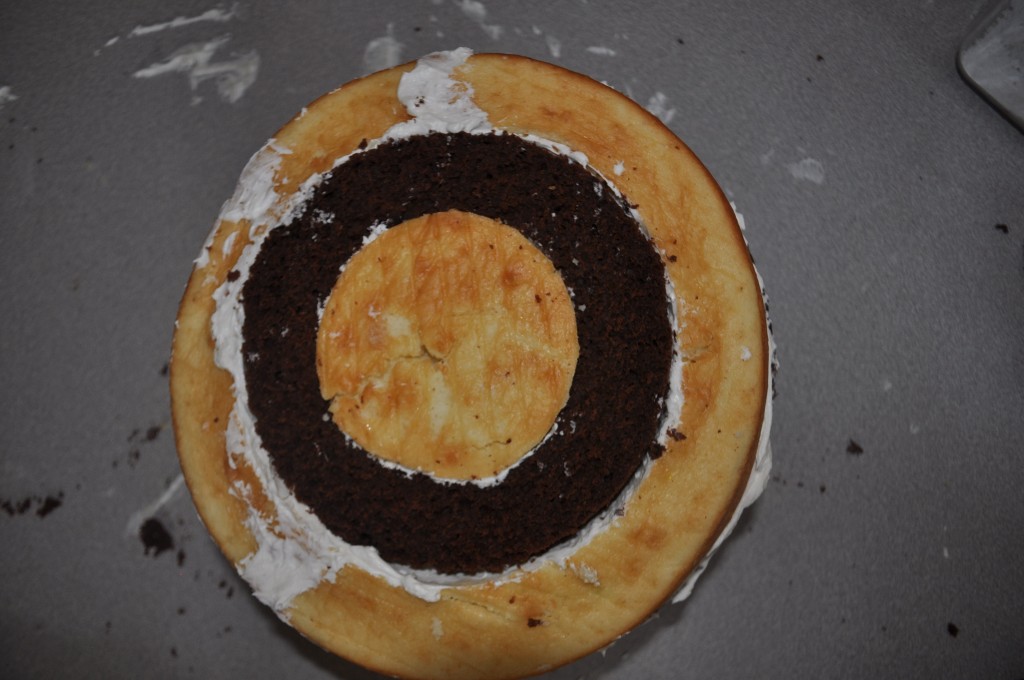
Place the yellow cake inside of the chocolate cake then add another layer of frosting in preparation for layer three.
Layer three looks just like layer one. Add a layer of icing on top of layer three and assemble the final layer of cake.
Here is the final layer. Yellow cake – chocolate cake – yellow cake.
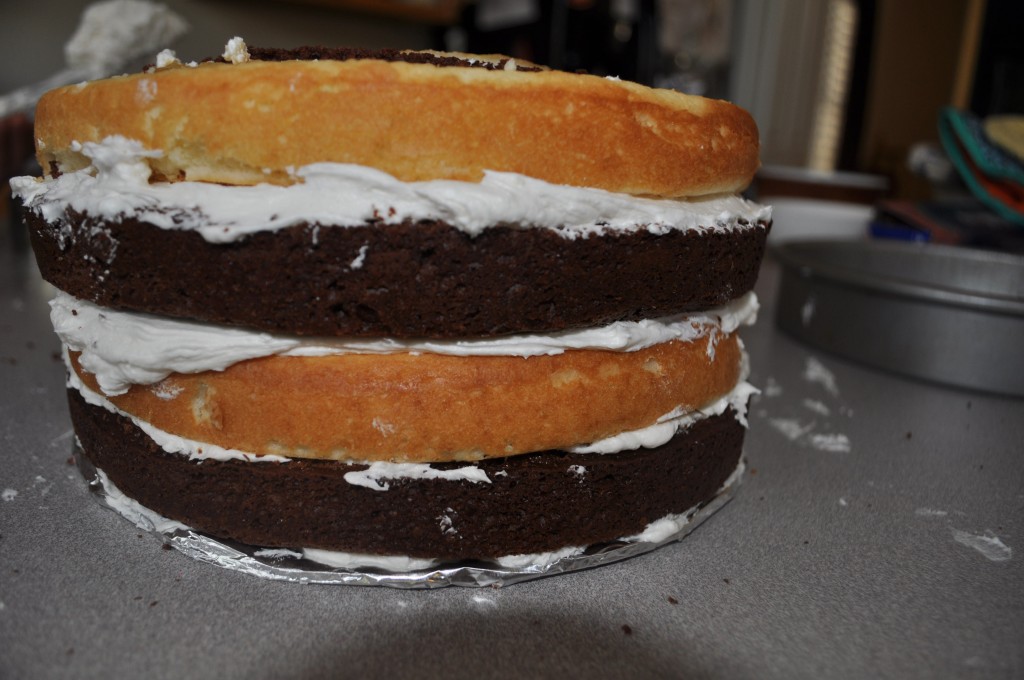
What the four layers look like from the side. I am no cake expert, but this came together nicely. It was a last minute idea that my daughter got from “cake boss.” Be careful what you let your kids watch! She told me they make these cakes in minutes.
Coat the entire cake with a thin layer of icing, or the crumb coat. Place in the refrigerator for at least 20 minutes while you work on the huge mess you have created. Cover the cake with another layer of icing and smooth the icing as much as possible. Decorate.
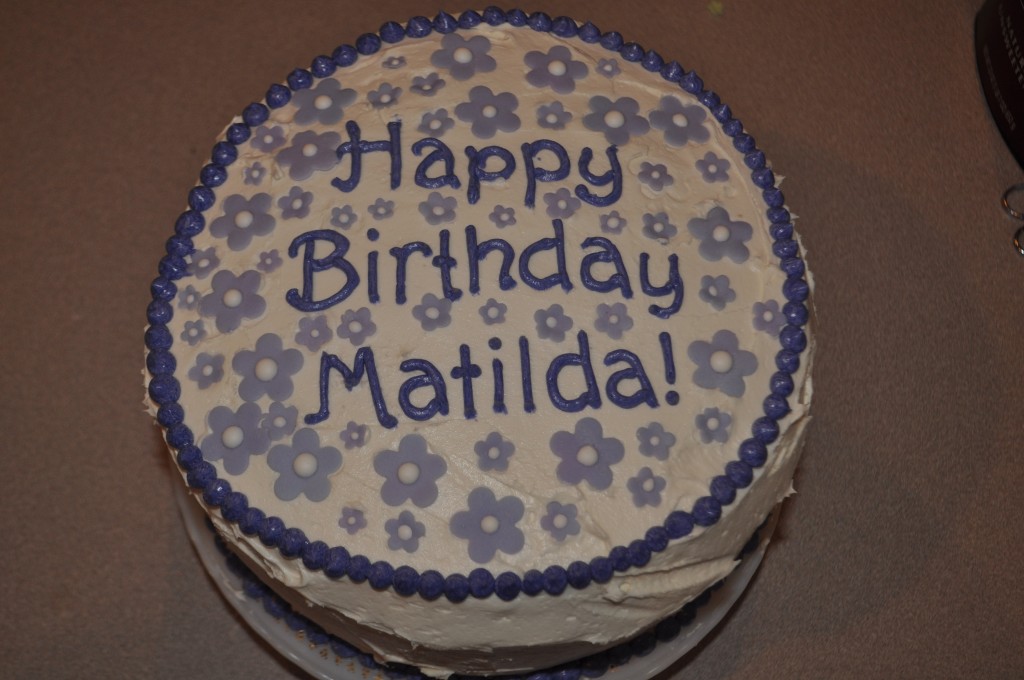
We spent so much time on the inside of this cake that we only had about 10 minutes to decorate the outside of the cake. For this one we used Fondant/Royal Icing flowers left over from another project and piped the Happy Birthday Message and the dot boarders using a Wilton 5 piping tip.
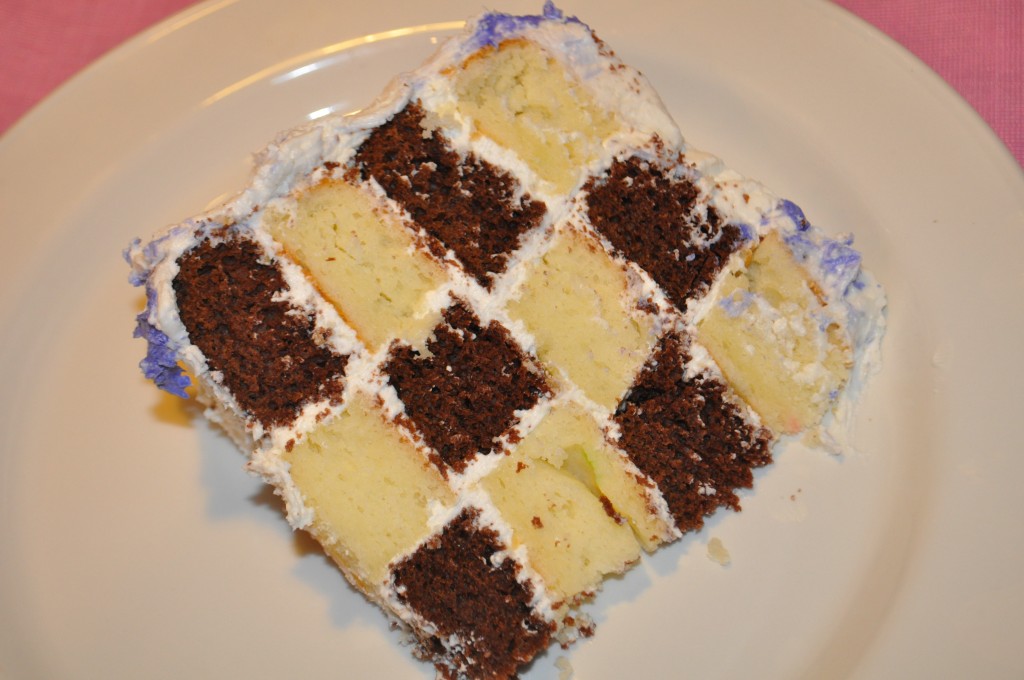
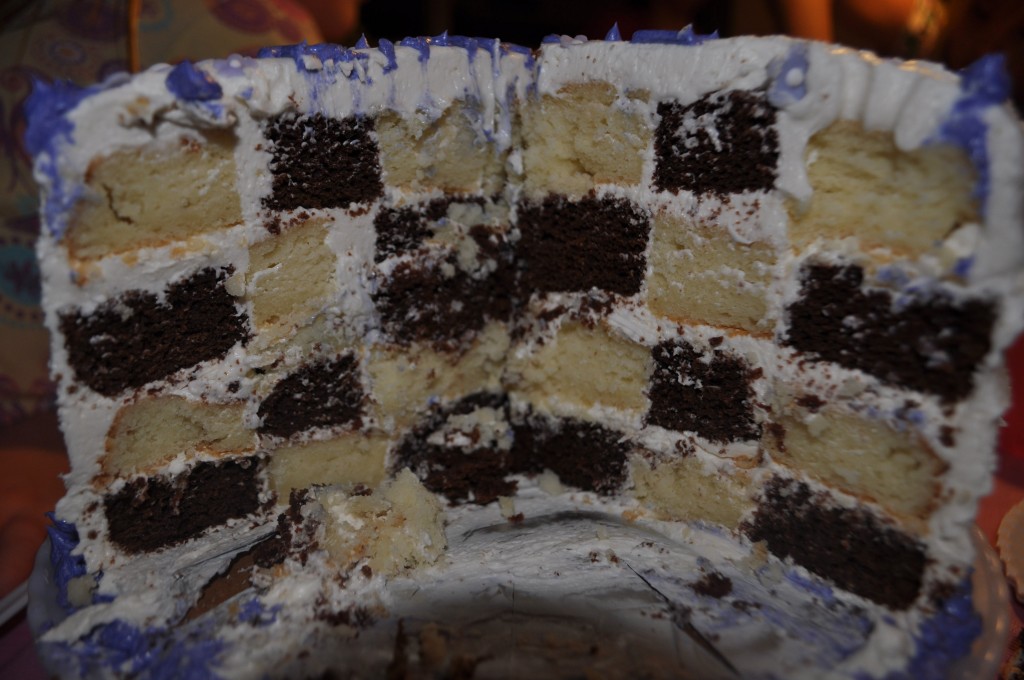
The kids screamed with excitement when they saw the inside of the cake. It worked! Thank you Cake Boss! I regret not getting a better picture of the inside of the cake. It was late, everyone was hungry, so it went fast and there was no time for a photo shoot. I really liked eating the bite-size squares wrapped in icing.
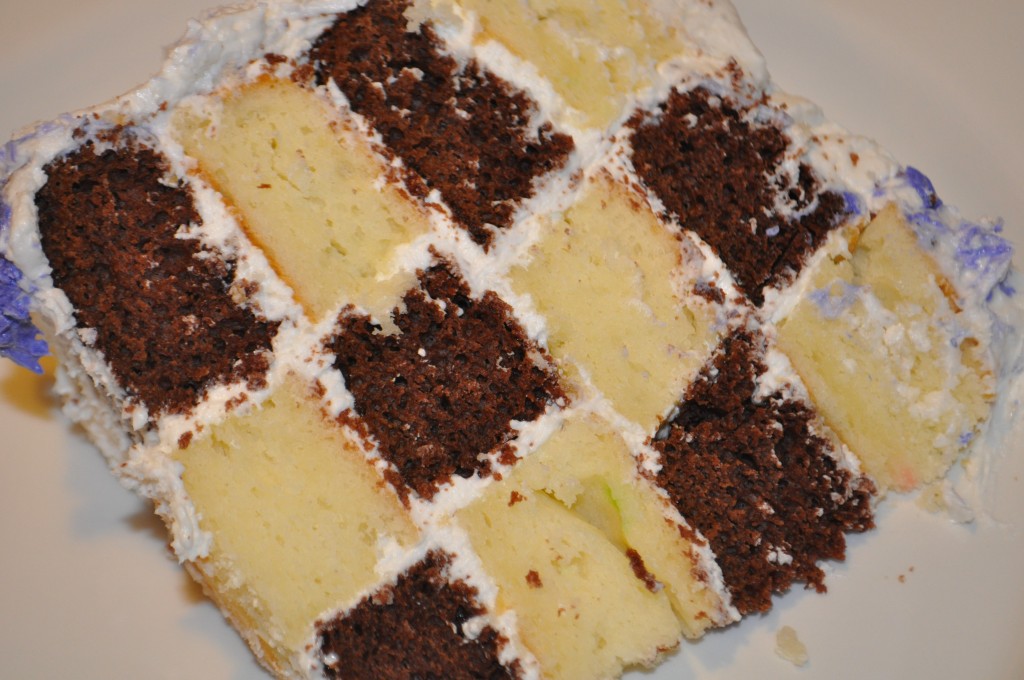
Here is a close up of the slices. Not bad for a last-minute cake using whatever I could find in the kitchen.
Tips for next time…
- Don’t do all the work in one day, especially the day of the party. Bake the layers and freeze until it is time to assemble the cake.
- For perfect squares bake a total of 4 cake mixes in deeping baking pans, and cut each layer 1 1/2 inches high. That way you get more of a perfect square when the cake is cut. Wilton & Pampered chef both make special pans for making this type of cake. We did fine using what we could find.
- Don’t place the cake on a regular cake stand. It was so heavy that it fell over when there was 1/2 of it remaining. Next time I would keep it on a simple platter.
- It might be fun trying a white layer with no yoke and other white layers that have been dyed seasonal colors. A black and orange cake would be fun for Halloween. For that cake I would use chocolate cake mix plus super black americolor dye and yellow cake mix plus orange dye.
- Only use high quality icing, like the buttercream frosting recipe found here.
- I can not stress how important it is to move these layers carefully. I lost 2 layers by moving the cake too quickly. We didn’t give up and continued baking until we had all the cake we needed.
- Next time I may add pudding mix to the cake batter to give it more stability.
- Don’t give up. When the cake flops, try and try again! It’s worth every bit of effort when you see how excited the kids are about the inside of the cake.
- Write on the cake using the tutorial found here.


I have been looking for a special receipe for my sons birthday cake this year! THIS ONE IS IT! He plays chess all the time, so this checker board cake will thrill him! Thank you so much for the wonderful instructions!
Wish me luck!
Betty,
I am happy to help!
I hope it worked okay!
Suzanne 🙂
It looks like you dropped a vanilla cake and a chocolate cake on the floor and tried to piece them together.
If you can’t say something nice, don’t say anything at all!
It was actually the most tasty cake with all the layers of frosting. I know have a wilton checkerboard insert but it isn’t as tasty without all the extra frosting.
And… try serving cake to 30 happy kids as fast as you can! I didn’t have a chance to cut the cake perfectly so we just plowed through it!
This is amazing! I’m 13 and love baking and was planning on making a cake for my sister’s 16th birthday, I watched all of cake bosses epesodes and have been planning on making it for her birthday but wasn’t sure how to cut the rings for the cake. This was sooooo helpful
Thank You!!!
Nicole-
Good luck with the cake – my daughters ages 13 & 11 love to help me in the kitchen.
Just make the cake and stages. Don’t wait until the last minute… trust me 🙂
thanks for looking!
Suzanne
I’ve always wondered how the heck this is made and thought it was some convoluted baking magic. Turns out it’s being careful and persistent haha! I’d only do this for a big party because the thought of having this much cake around boggles my mind.
I came here via a search hit for your Skellington cookies and have now enjoyed an hour or so marveling at your creativity and talent. You rock!
This will be perfect for my sons minecraft bday cake! Thank you for the pattern tips. I didn’t want to buy special pans for one cake!
Let me know how it goes! A minecraft cake will be so much fun. I finally bought the wilton checkerboard pans but I think this cake tastes a lot better because of all the icing in the layers. YUM!!! Happy Birthday to your son. 🙂
Suzanne
this is really helpful! I am 13 and making this for my food tech final project, but i didn’t have the pans and wanted to know how to cut it. This is great! thanks x
Did it work? I love this cake because of all the extra frosting! Yum!!!
Suzanne 🙂
Omg Iam so nervous! I just made this cake, but I forgot to frost inside the circles! The cake also isn’t so stable, I need a firmer cake I think. I hope it doesn’t all fall apart when it’s cut later! Wish me luck!
It should work! Good luck!