How to Make a Minion Cake
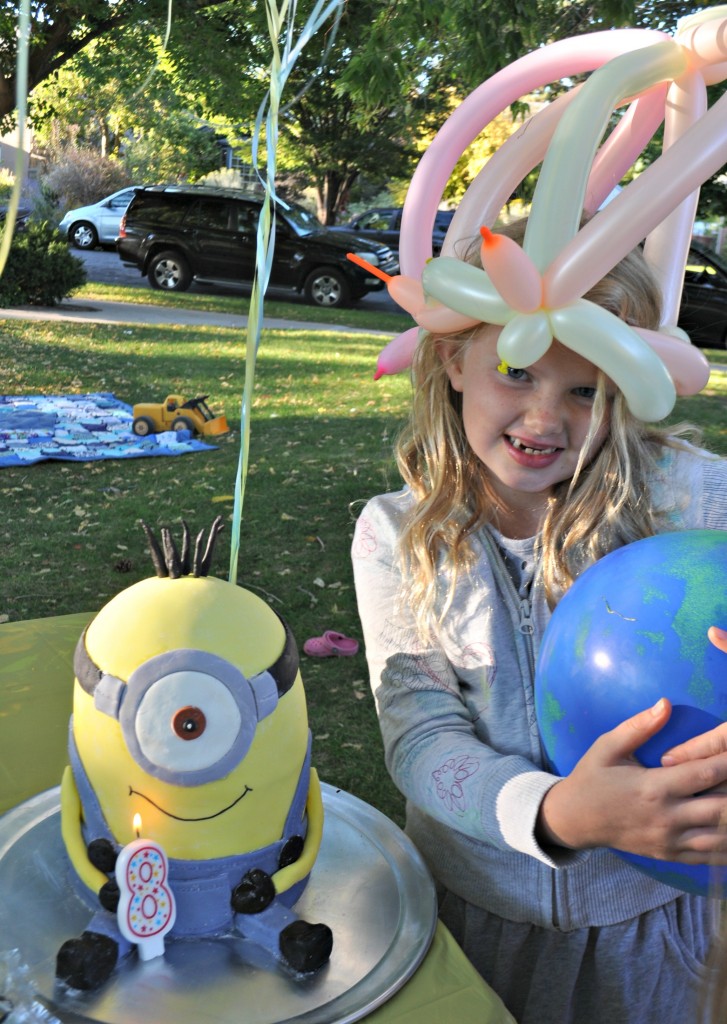
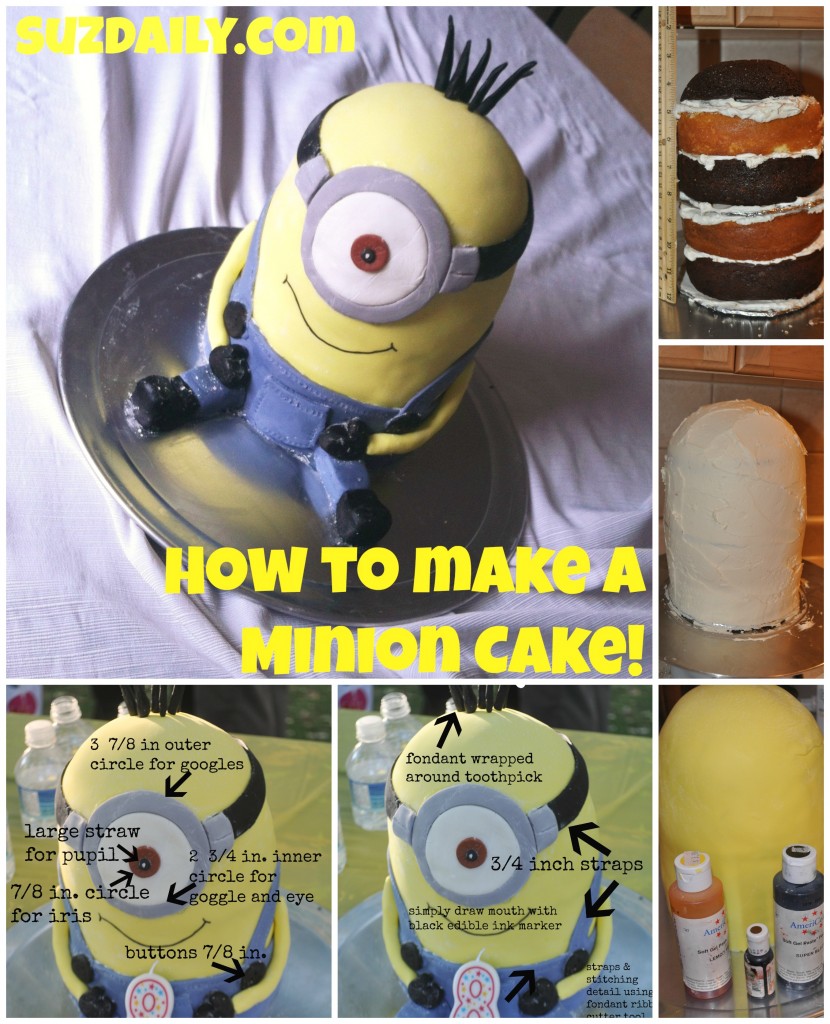
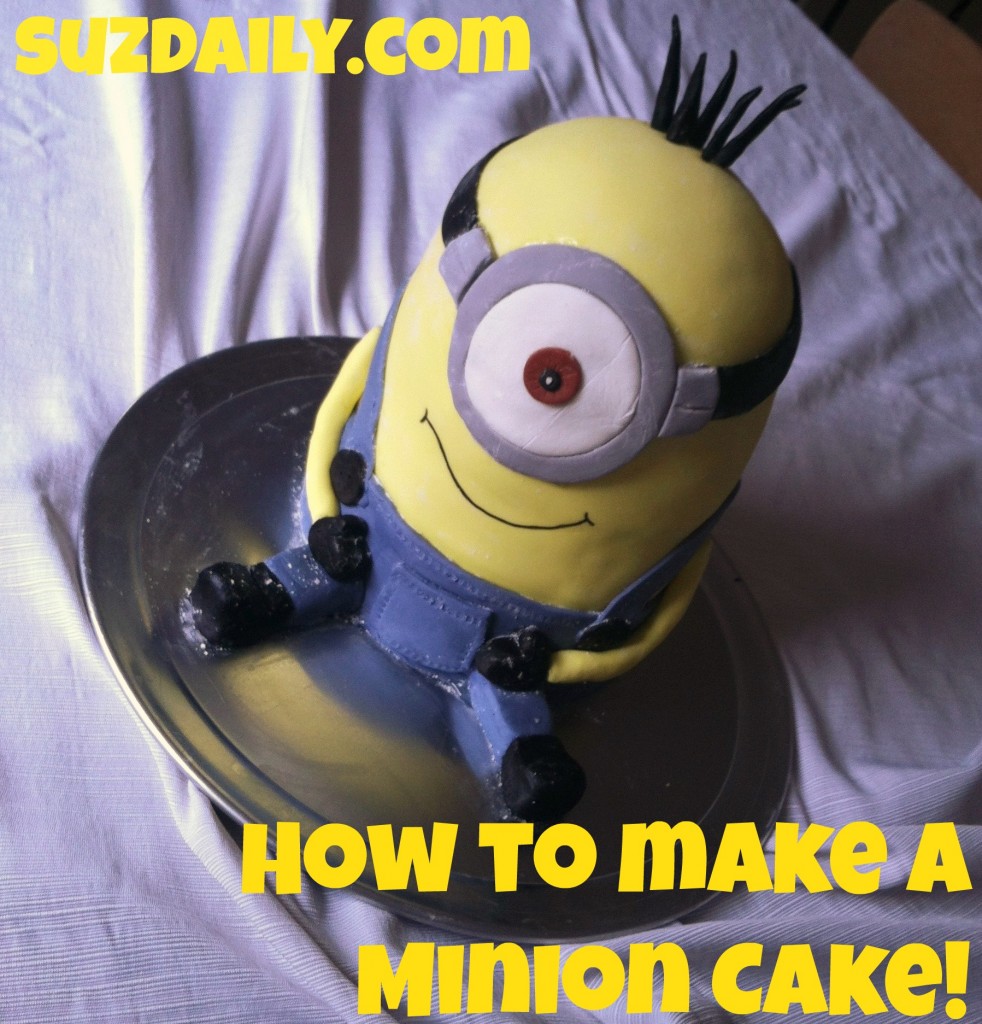 Matilda turned 8 this Fall! I can’t believe it. All she wanted to eat on her birthday was a minion cake! With a two-month old at this was quite the challenge! After lots and lots of thought and tedious calculation I finally created a template for a 3-D minion cake. I took plenty of notes back in September and finally have a free moment (baby is sleeping zzz…) to share the instructions. I hope this tutorial helps to make someone else’s birthday special! Besides, who doesn’t love Minions?
Also, please see my other post – it is much more DETAILED – HOW TO MAKE A PURPLE MINION CAKE! CLICK HERE!
Matilda you are the sweetest little girl! Please please don’t grow up! xoxo -Mom
Keep reading for a detailed tutorial with lots of photos!
How to Make a Minion Cake: Practical Advice
Do not make the same mistakes I make… so here is some free practical advice for making this minion cake. First, do not expect to do all this work in one night. Yes, I did! It was a crazy weekend! I started the cake at 8PM after my kids went to bed and finished the cake at 3AM the day of my daughter’s birthday. Luckily, I hit Michael’s the day before making the cake for a few missing colors and the six inch baking pans. I just happened to have an oven safe bowl for the dome part of the minion’s head.
If possible, prepare the buttercream and cakes a day or two in advanced. Wrap the cake layers for the minion in saran wrap and freeze until ready to use. This saves a lot of time when assembling and decorating the cake. I have seen way too many Cake Boss episodes and forget that I don’t have a 20 person staff to help me out.
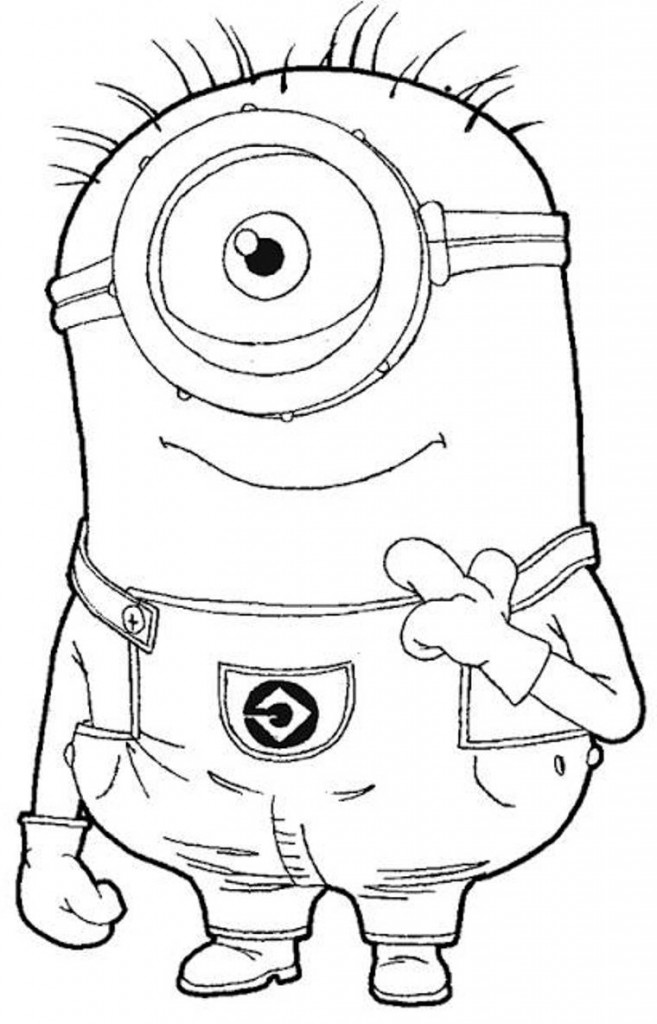
Marshmallow fondant can be made in advanced but in my climate it dries out very quickly. Also, don’t worry too much about perfection with your little minion cake. After watching Despicable Me over 100 times I realized minions come in all shapes and sizes so the layers of cake do not have to be exactly the size that I have outlined. I really doubt I have an ounce of artistic ability so I used a coloring page online to come out with the proportions used in this tutorial. I am much better at Geometry – there was a lot of math involved in coming up with this design.
In the end, after all the stressing the cake was not 100% perfect – but this happy little minion cake was devoured in moments and the kids LOVED it! So just enjoy the process. There may be bumps and wrinkles in your minion cake but just let it go and have fun! I let my ten year old daughter stay up until 1AM to help out. Kids LOVE this! So enjoy the minion cake journey! Oh yes, don’t be overwhelmed by the list of supplies, I am just trying to remember everything.
Step 1 : How to Make a Minion Cake – Gather supplies
Checklist: Supplies needed for a Minion Cake
- at least 2 six inch round cake pans
- one oven safe dome shaped bowl with approximately 6 inch circumference
- 2 six inch cardboard rounds – one of which has a one inch hole cut in the center – be sure they are at least 1/4 inch larger around then the baked cake
- 4 six inch round parchment paper rounds
- yellow food dye (I used Americolor lemon yellow)
- black food dye (Americolor super black)
- brown food dye (Americolor brown)
- denim color blue (Wilton delphinium blue)
- food safe marker (Wilton black)
- bamboo skewers or other support for cake construction – cut four about 3 1/2 inches , cut one 8 1/2 inch
- toothpicks for supporting minion arms and minion hair
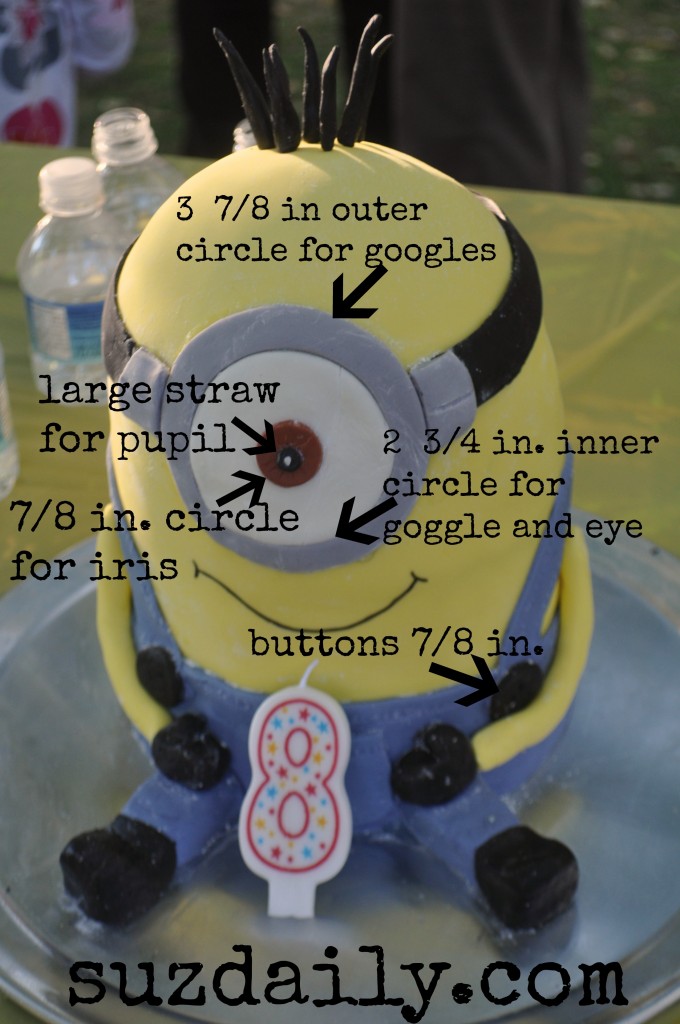
- Round cookie cutter measuring 3 7/8 inches, for outside edge of goggle (found in Ateco set of round cookie cutters)
- Round cookie cutter measuring 2 3/4 inches, for cutting inside edge of goggle (Ateco round set again)
- Small round cookie cutter measuring 7/8 inch, for cutting the iris of the minion eye and also for cutting the buttons
- Large gas station straw for cutting the black pupil
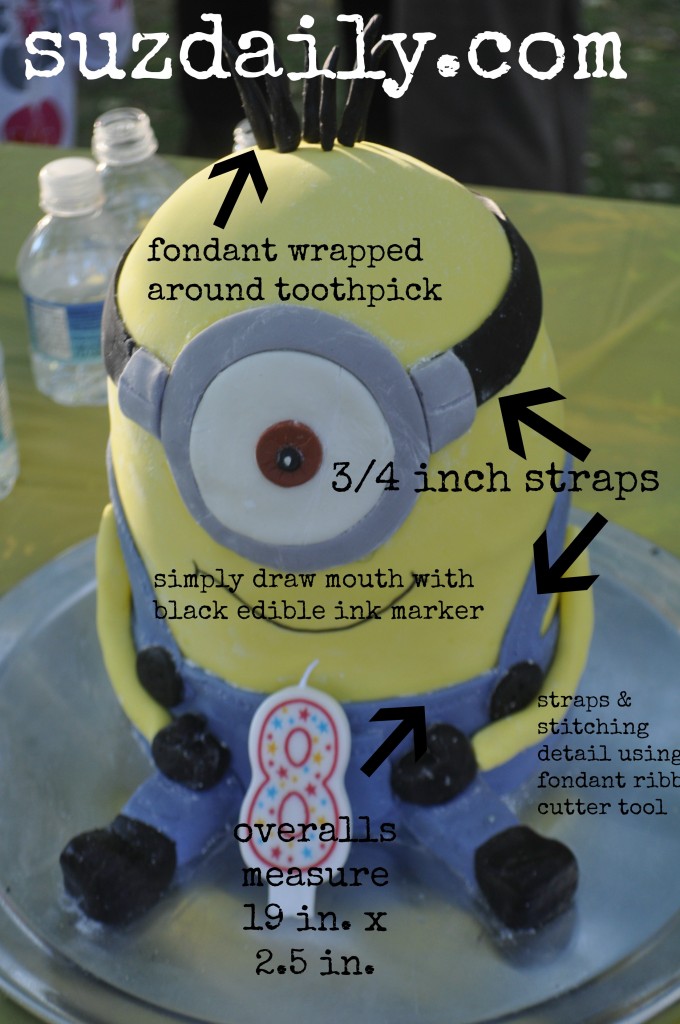
- Wilton or other tool set for cutting 3/4 inch straps for overalls and the goggle strap
- Wilton tool for pressing stitch design into the overalls
- Wilton silver pearl dust (to paint over goggles… I skipped this step but it would look awesome!)
- lemon extract or vodka for painting the goggles silver
- two cakes mixes, baked using the following recipe for 3D cakes – again make two batches to fill the total 4 six in cakes and the small dome cake for the top
- one batch fluffly buttercream, recipe found here – or other stable buttercream icing of your choice
- two batches marshmallow fondant, recipe found here, or ready made fondant from a cake supply store
So let’s make a minion cake!
Step 2 : How to Make a Minion Cake – Bake the cake layers
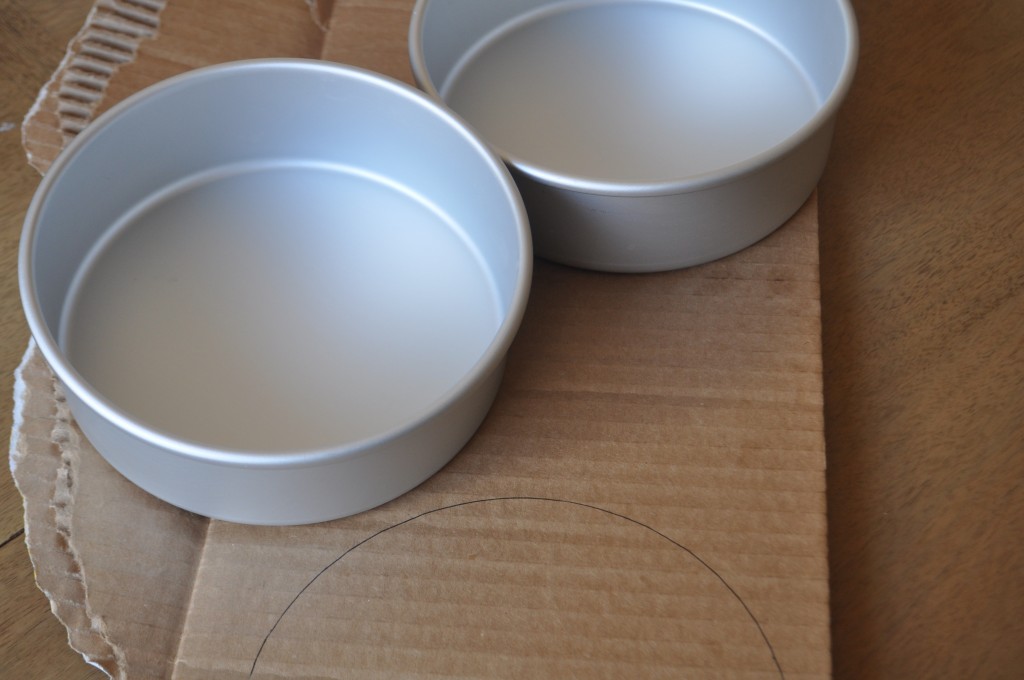
Thank you Michael’s Craft Stores for the 40% off coupons. I was able to find six in cake pans. I was in budget mode so instead of buying the cardboard rounds (maybe only $0.50 each?) I traced the top of my cake pans and covered them in aluminum foil. I measured from the top of the cake pan because I wanted the cardboard rounds to be slightly larger than the cake itself. We need to allow room for the icing. In one I made a circle in the center so that a large bamboo skewer support could go through the entire length of the cake. More on this later. Now you are ready to Bake your Minion Cake!
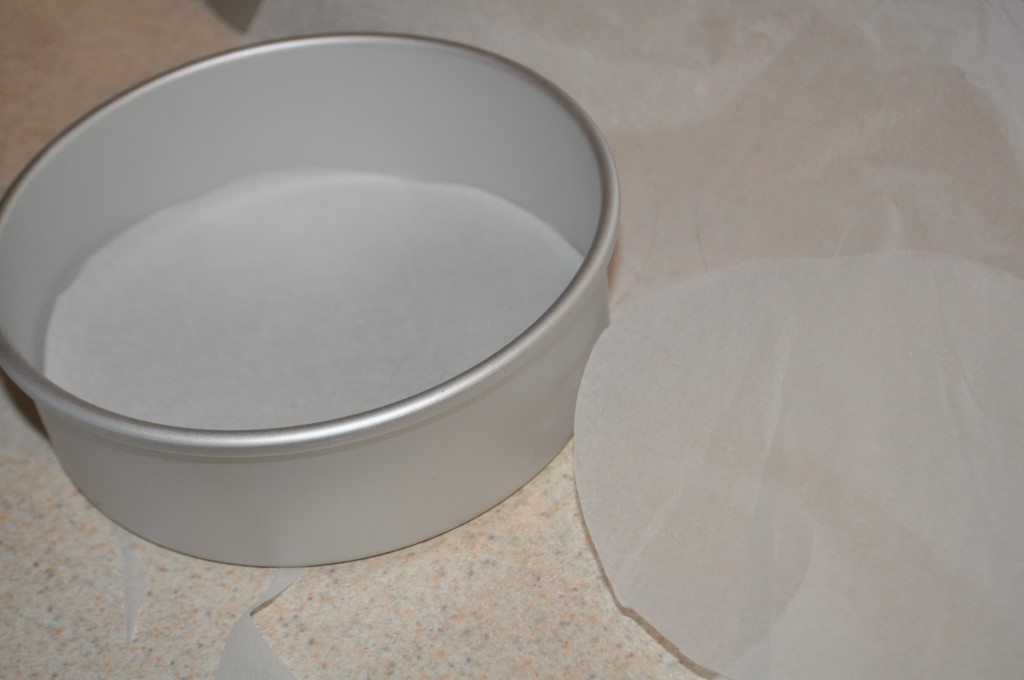 Cut parchment rounds 6 inches using the cake pan as a guide. Do not attempt to bake your cake with out a layer of parchment paper at the bottom. It is a lifesaver! Place the parchment rounds at the bottom of the cake pan and coat generously with cooking spray. Bake four 6 inch round cakes as directed in the following recipe – there will be extra batter for the dome portion of the cake and maybe even a little leftover for mini cupcakes. If desired use your favorite recipe, just make sure that it produces a sturdy cake that can be stacked. We did two chocolate layers and two yellow cake layers. When the six inch round cakes have cooled, trim each one so that they are 1.5 inches high. The round dome portion should measure about 2 inches at the highest point. This does not have to be exact.
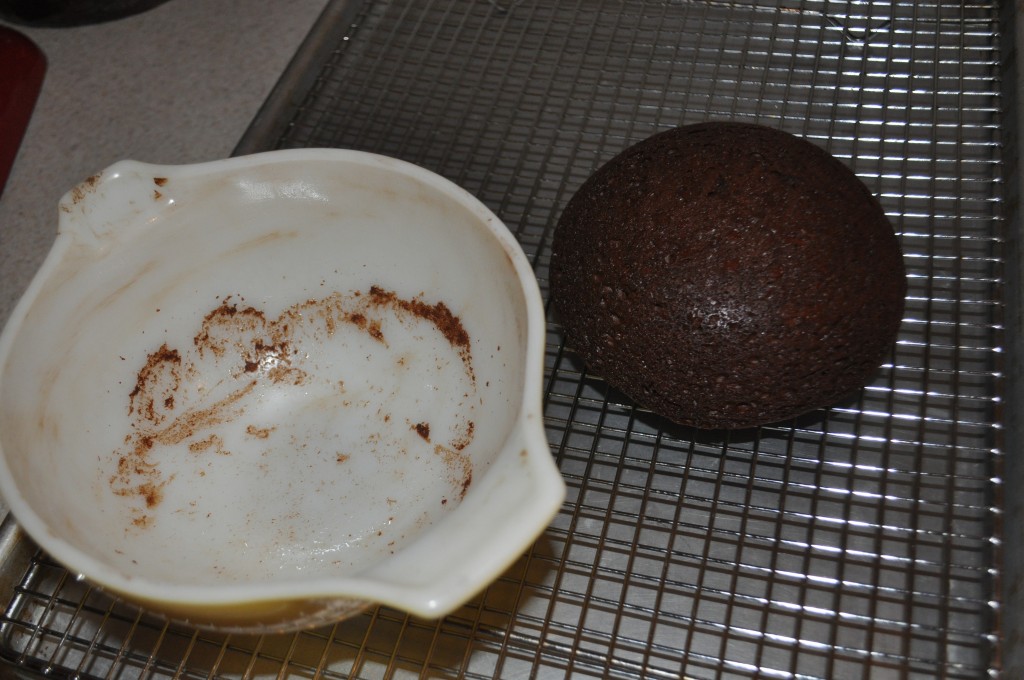
Here is the bowl I used for baking the dome portion of the cake. This is a vintage pyrex bowl I found at a yard sale a long time ago. I never knew it would come in handy for this cake! If I didn’t have this perfect bowl I would simply bake another six inch round cake and slice it to make the dome shape for the top of the minion cake. Rice crispy treats could also use for this part of the cake. I lucked out with this pyrex bowl.
Step 3 : How to Make a Minion Cake – Frost the cake and construct the minion cake body using buttercream
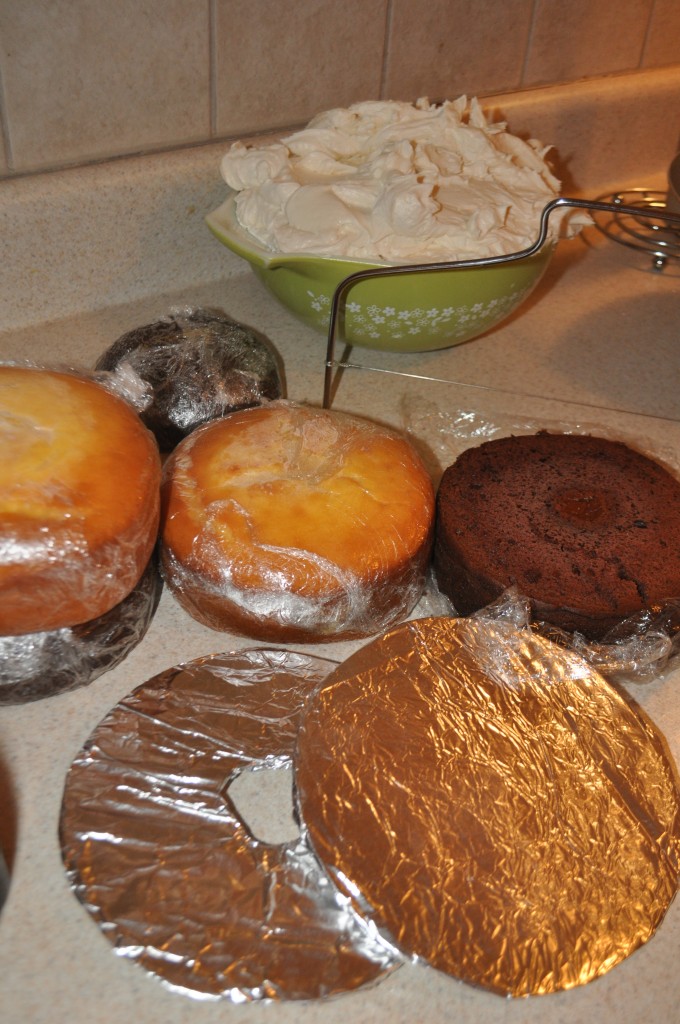 I am ready to go! In this picture I am trimming the round cakes so that they measure about 1.5 inches high. An inexpensive Wilton cake leveling tool does the job. Note I have the buttercream ready to go (I made way too much that day). I also have two foil covered rounds that will be used in constructing the minion cake. Notice that the second round has a small hole in the center.
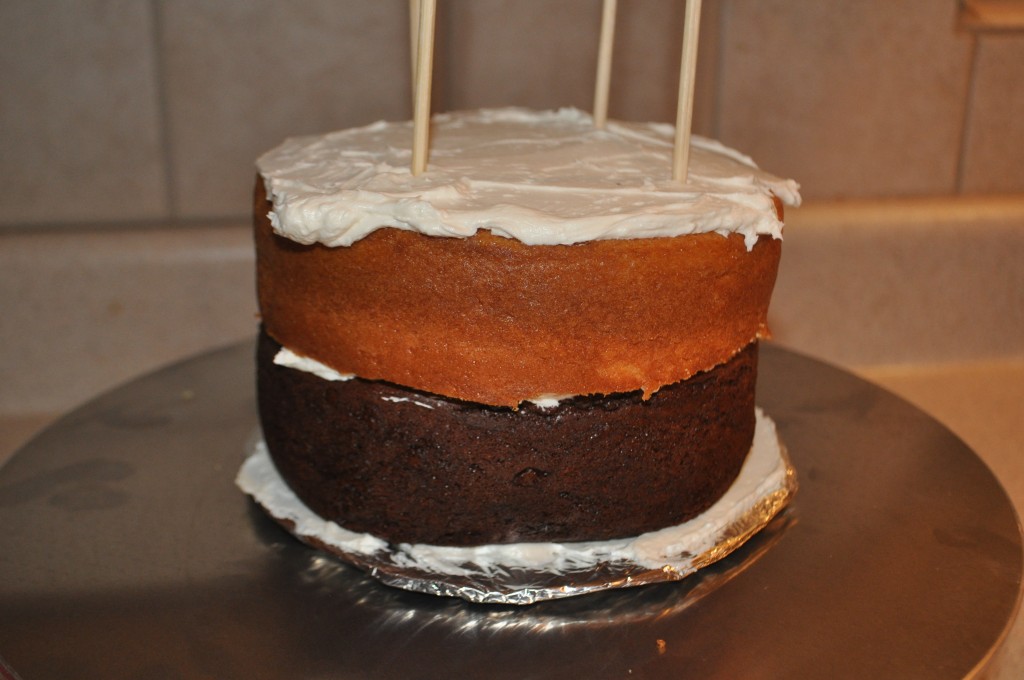
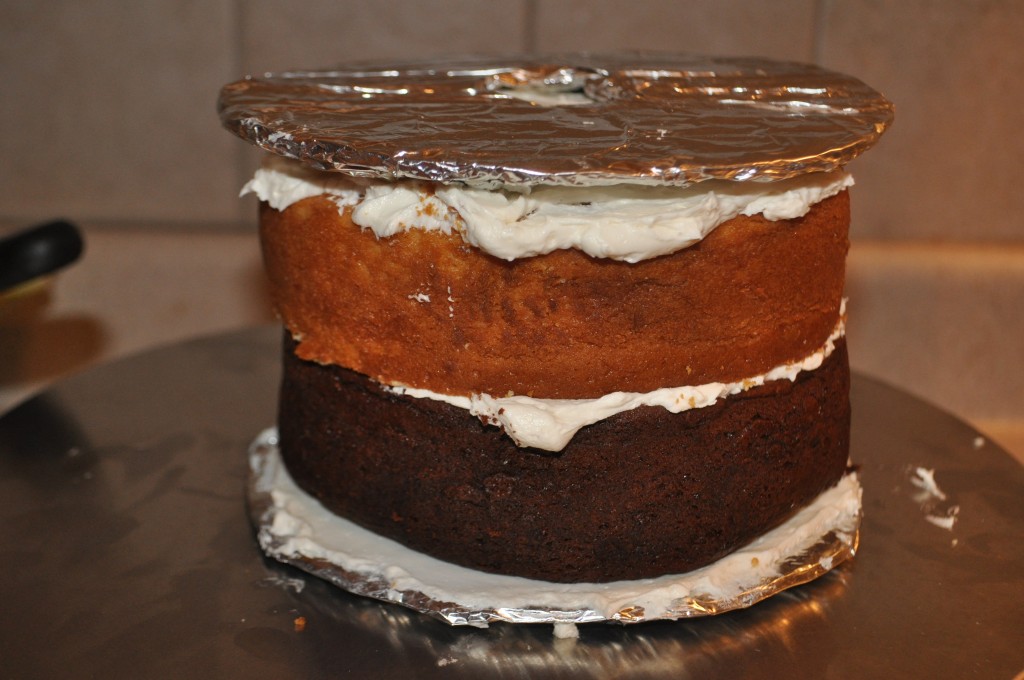
This part is so fun! Place a layer of icing on the foil covered cardboard round. Next comes the first cake layer. Again, these layers of the minion cake are made from 6 inch round cake pans and trimmed to 1.5 inches high. After that first chocolate layer I added a thick layer of buttercream. On top of that, a yellow cake layer and more icing. So basically, icing, cake, icing, cake, icing. As you can see above I place 4 skewers into the two cake layers about one inch from the edge of the cake. Why am I adding bamboo skewers? Because our minion cake needs BONES! Some cheap support. After the bamboo skewers are placed into the two layers of cake I trim them so the top is about 1/8 inch below the buttercream. You could use fancy supports from a cake decorating store – but for me the bamboo skewers work fine. Just remember to look for them when you are cutting and serving the cake.
After the bamboo skewers are added gently place the second cardboard round on top of the icing and the skewers. This cardboard should rest on the skewers so that the skewers can hold the weight of the next three layers of cake and icing. Notice that the cardboard rounds are slightly larger than the cakes. This allows room for a thick layer of buttercream icing.
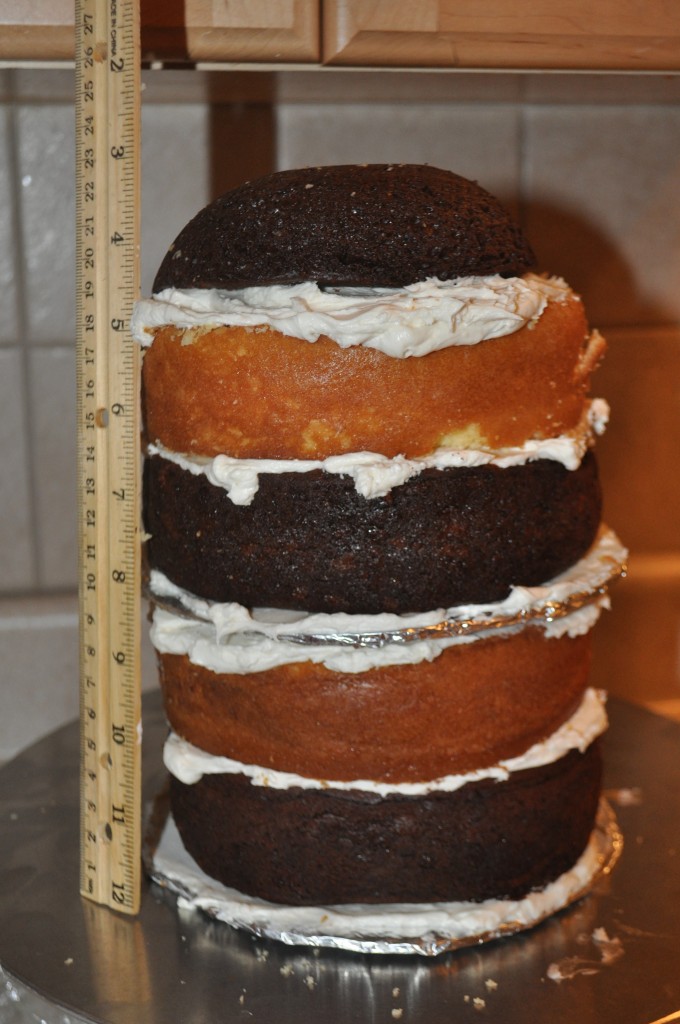
Continue by adding in this order; buttercream, cake round, buttercream, cake round, buttercream, small dome-shaped cake. As you can see the final height of the minion cake will be around 9.3 inches – a very manageable size for a stay-at-home-mom bakery. The minion cake is starting to take shape.
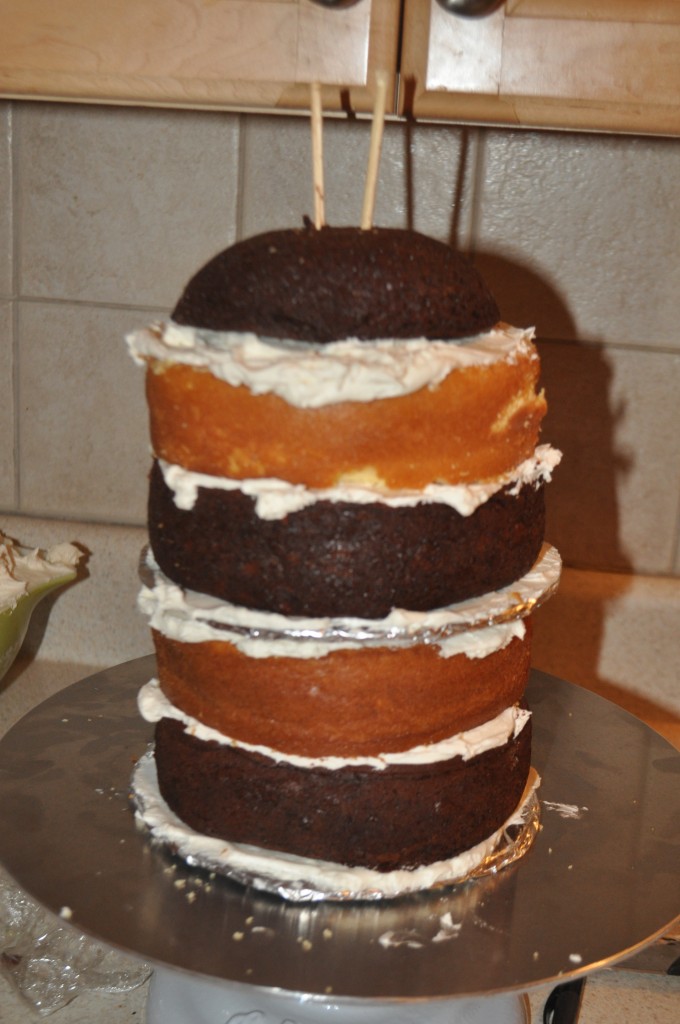 I next insert two bamboo skewers into the layers of cake to keep the entire minion cake together. Trim just below the last layer of buttercream. Again, take note of the placement for when you are serving the cake.
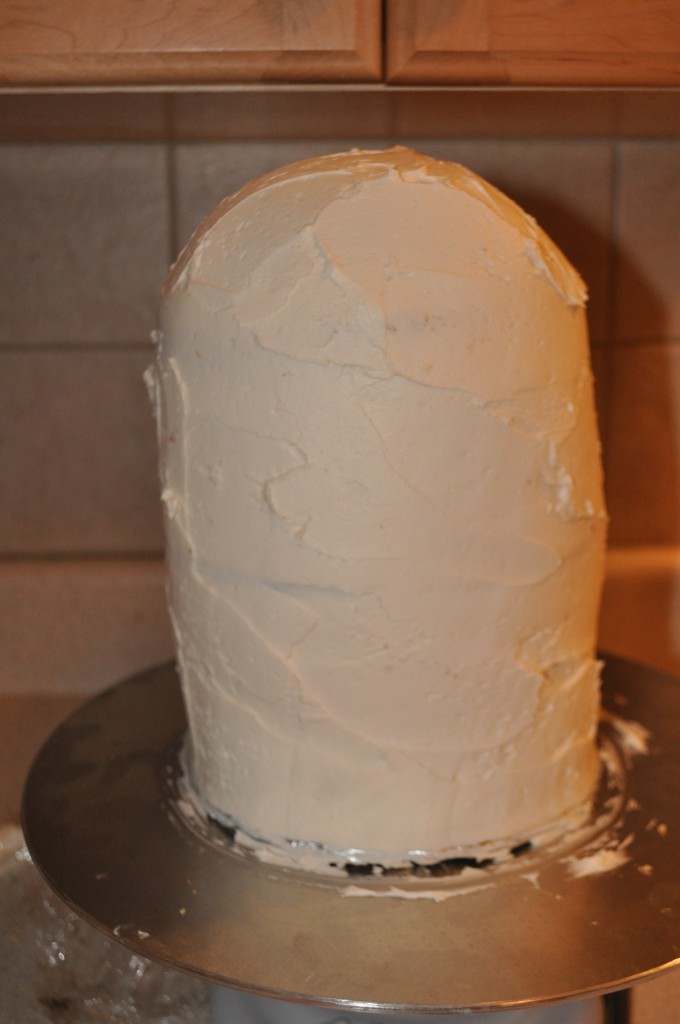
Now slap on that first layer of icing – yes the crumb layer so that the entire minion cake is covered in icing. Place the cake in the refrigerator to cool as you clean up or work on the fondant… or even better yet – stop here and save the decorating for the next day!! Once this layer of icing has cooled add an additional layer of icing, nice and smooth. Remember the fondant will only look as pretty as the buttercream layer underneath it…. I just thought of a simple shortcut – add yellow food dye to the buttercream and make that the minion skin. Not as professional looking but would still be very cute!
Step 4 : How to Make a Minion cake – Prepare and Decorate with Fondant
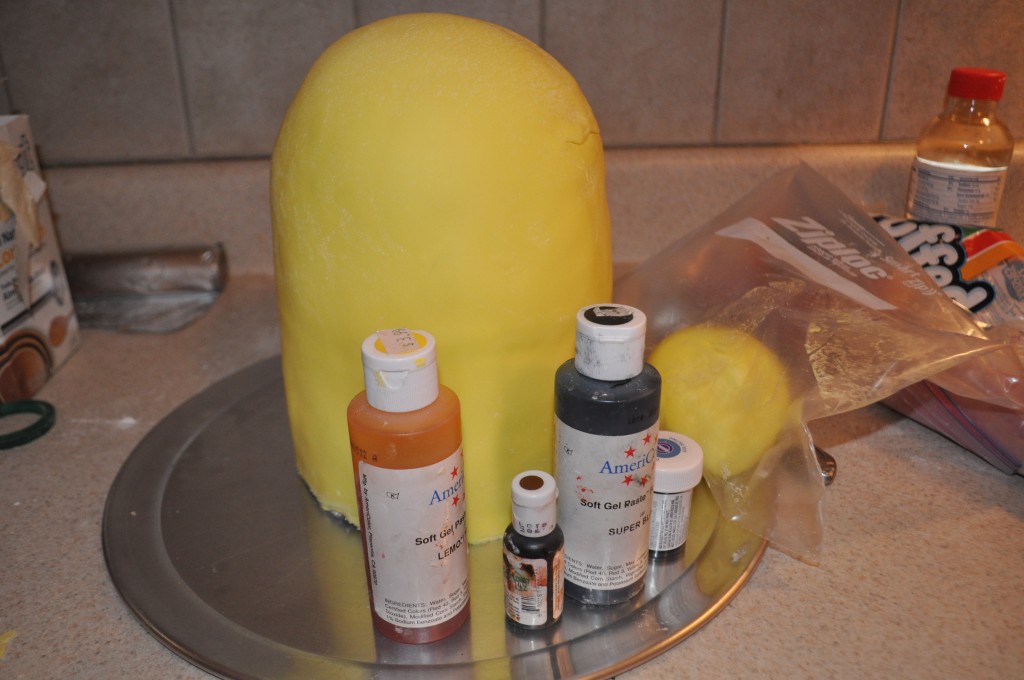
As stated above, you will need two batches of the marshmallow fondant recipe. Dye one entire batch yellow for the minion skin, including arms. The second batch of marshmallow fondant should be dyed as follows – about 2/3 of the batch in delphinium blue with a little bit of black for the overalls, about 1/4 of of the batch black for the mittens, boots, buttons, and other details. The remainder should be split between white and grey. White fondant for the eye. And a small bit of grey fondant for the goggles.(use the smallest amount of black to get grey). Save a small piece of fondant to cut the 7/8 brown eye.
If you have never worked with marshmallow fondant before I would do a practice round a couple weeks before the party. It is very fun, but stressful if you are running out of time.
Roll out the fondant either using the dry method (cornstarch) or using shortening on the rolling pin and counters. I prefer to use corn starch to roll out the fondant because it is easier to clean up. You will need a large piece of yellow to cover the entire minion cake. This large piece of yellow fondant minion skin should measure about 12 inches high by 20 inches wide. Carefully place the fondant over the minion cake and smooth using fondant tools. The back of my cake is sort of a mess – why? Because this is for fun, and I tend to work quickly at this stage in making the cake. No one cares what the back of the cake looks like! Seal the yellow fondant together and cut the edges to fit around the base of the minion.
Progress! The minion is almost ready to go! Now simply cut out the rest of the details and place on the cake. I am able to use just a bit of water to get the fondant details to stick. If necessary use corn syrup or piping gel to get the details to stick to the base of the minion cake.
Cut out the pieces for the goggle first. Use the sizes listed in the photo above. I found it helpful to let the cut pieces sit on the counter for a few minutes to dry out before placing them on the cake. When I rushed, the eye started to sag and loose it’s circle appearance. Also cut out the 7/8 inch buttons to be used later.
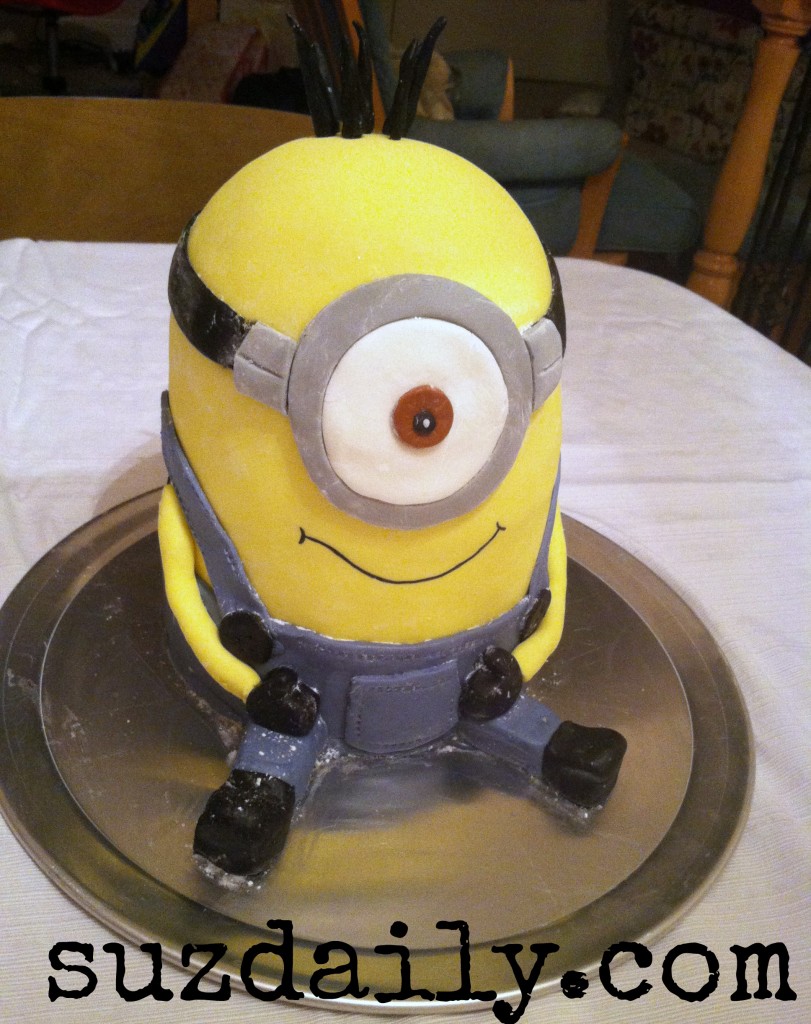
Wrap black fondant around the toothpicks to create the minion hair. I could have made more. Prepare a large 19 inch by 2.5 inch rectangle of the blue for the base of the overalls. Use a fondant ribbon cutter set at 3/4 inch to cut long strips of fondant for the goggles and the overall straps. Add stitch details using the same ribbon cutter tool. Secure arms and legs using toothpick that come out of the side of the minion cake. Just play around with the fondant as if it were modeling clay or play dough – this should be fun! Last place the buttons and the pocket on the minion cake.
The final step was to add the cute smile on the minion cake using a black edible ink marker. So fun! I am available for questions so let me know if I left something out.
Here is the minion image I used to get my measurements for the minion goggles. I really hope you are able to recreate this minion cake. Enjoy!
Essential tools and supplies


Cute minion. Thanks for the great tutorial.
I’m glad you enjoyed it! Thanks for looking!
Suzanne 🙂
Can you make a tnt cake from minecraft?
I have seen TNT cakes online – they look very cool. If you are interested in baked goods it’s best if you contact me through my facebook page.
https://www.facebook.com/sweetsbysuz
Cathy, Did it help? I am making collection of minion cakes from this tutorial – please let me know if you would like to add it!
Suzanne 🙂
Incredible!!! So talented!
Thanks Becca! It was fun!
Hi can u tell me how heavy this cake is(pounds), just a rough idea? Thanks!
Aneeza – I am not sure – it is made of two cake mixes and 2-3 cups icing plus fondant. It wasn’t too heavy. I will try to figure it out and get back to you. It is six inches around and about 7 1/2 inches high. We moved it in a large box. I made a purple minion cake and it was fine on one of those foam boards from the cake stores.
Why do you need the weight? Is this how you calculate serving size?
Thanks for looking,
Suzanne 🙂
Thanks for putting this tutorial together – I am going to attempt an “evil” minion cake tomorrow. I’m doing the cake in buttercream – except for the details and pants because the birthday boy doesn’t like that “fake frosting.” Do you have any tips for doing the hair for the purple minion? Thanks so much!!
I will email you a picture of my ‘evil’ purple minion cake. I made one in December for my nephew but haven’t had time for the tutorial. My kids think fondant is gross too – but I put it over a really thick layer of buttercream. Then I peel off the fondant when we are eating the cake. So no one eats the fondant. The fondant actually makes it easy to transport the cake.
As to the hair for the purple minion – I spent hours stressing over it…. you have a few options. 1) The best, if possible find purple cotton candy. I did not have access to a cotton candy machine so I was not able to use the cotton candy. 2) use thick buttercream and just pipe a lot of purple squiggles. 3) What I did – I made lots of worm like strands of hair out of fondant. I also wrapped some fondant around floral wire so that some of the hair stuck up….
i will email you a photo of what I did. Also, if I get time today I will work on that purple minion tutorial. Have fun!!!
Remember it’s just a cake! The kids will love it!
Suzanne 🙂
Thank you so much for sharing all your tips!!! It was so helpful and my 6 yrs old daughter was so happy!
I made a girl minion for a first time,it was long but successful.
Sonia,
I am so glad this post helped! It does take a long time to make this cake but worth all the effort to make your daughter’s birthday special!
I look forward to trying new cake designs for my kids’ birthdays.
Thanks for looking! 🙂
Suzanne
Sonia, I would love to see a photo. I am putting all the minion cakes onto one post – would you like to add it?
Suzanne
awwwwwwwwwwwwwwww i want it i am mad about minions
Oh thank you so much Louise! It was so fun to make this cake!
Suzanne 🙂
I love your cake I want to do same thing for my boy how you make the pants plz explain me more with details plzzzzzz
Adriana,
Look at this post – I made a purple minion cake the same way. This has more detailed instructions. The front of the overall are made out of a rectangle that measures 19 x 2.5 inches. It’s just a long rectangle. Does that make sense? Also, for the straps for the overall use long fondant rectangles that are about 3/4 inch wide and wrap on the side of the cake.
Look at this post – it should help for constructing the pants!
Suzanne 🙂
https://www.suzdaily.com/2014/03/how-to-make-a-purple-minion-cake.html
Love your minion cake! My son is turning 5 in May and loves Despicable Me. I’m planning to tackle this cake but want to know if you think this can be done with just buttercream rather than fondant- don’t know how to work with it and don’t particularly like the taste. Lmk if you think frosting world work.
Laura,
I agree – fondant is gross!!!!! The reason I use fondant is it helps when transporting the cake. When I serve a slice I am certain to peel off the fondant.
If you have never used fondant before it can be tricky. I definitely think you could make this cake out of all buttercream. The surface would have more texture – but its just a cake – for a 5 year old. He will love it!! The most important things you can take away from this tutorial 1) do the work in stages – bake, ice, decorate in at least two days. 2) follow the same measurements I have given. I based them off of a couple of minion images I found online. With characters you just have to get the proportions just right or it will look goofy. If you do not have the cookie cutters I used, measure the outline of the googles using a protractor. Or cut circles to that size and trace the template onto the buttercream. For the mouth you could easily use black licorice. Form the arms, legs, feet and hands maybe with rice crispy treats before covering with icing.
Let me know how it goes! Thanks for looking!
Suzanne 🙂
Quick question! How many ppl does this cake feed? Thanks, and great job!
Gale,
Good question. Following the Wilton guide for cake serving sizes, one two layer six inch cake should feed 12 people. In this case I have a total of 4 six inch cake layers, so it would be fair to say it serves at least 24. I think by making smaller slices (especially for the part with the BRAINS 🙂 ) I could maybe stretch it out to 28?
At both family parties where I made this we only went through the upper layer of the minion. Looks like cake brain surgery.
Thanks for looking! I hope that helps!
Suzanne
Hello,
I am making 3 of these cakes for this weekend (yikes!)
My questions is….In the past I have tried covering a tall cake like this in fondant and it was a total disaster!! The fondant kept ripping from the height and weight and it was terrible! Any tips?
Thanks in advance 🙂
Leyla,
The back of my cake is not perfect. I have a few small tares, maybe because I am no cake expert. This cake isn’t huge so I don’t think it should be a problem. What I did notice, is that when I did the purple minion cake it started to warp because it was at room temperature for 4-5 hours when transporting it to the party. When the buttercream got to warm it affected the shape of the cake.
When I made this I just took a large piece of fondant and draped it around. The back is not perfect – there are seams.
Also, what kind of fondant are you using? I have not had luck with the wilton brand – it is very dry. The silk brand is easier to work with. I found with my homemade marshmallow fondant I had to keep it rather soft for covering the large area in yellow and make the pieces used for the details more stiff.
Does that help at all?
Suzanne
Hello! Thank you for mAking this tutorial, I am In the process of making this cake! Any tips on transportation? It seems really wobbly!! I even put extra support! Thanks!!
Casey,
I have made a cake like this two times and haven’t had any problems transporting it. I would make sure the cake is chilled when you leave so that the buttercream isn’t melting.
The first time I made this cake it was actually fine sitting on the back seat of my car with one of my kids. It looked hilarious in my rear view mirror. When I made a puple minion I had to take it in my car, to a train, to another train, to a car, and to a party. For most of the trip we just had the minion cake in a box. I was lucky to find one that was very close to the size of the cake stand so it didn’t drive around. One thing I did do different the second time (because of the complicated trasportation) was just wait for the last second to put the hair on the minion cake.
Here is a post about that. The cake arrived in one piece. The evil minion cake looked so funny on my brothers lap on the way to the party.
https://www.suzdaily.com/2014/03/how-to-make-a-purple-minion-cake.html
Hi, thanks for a great tutorial 🙂 It’s my sons birthday today and I’m hoping to make this cake. I baked the cakes yesterday and I’m doing the rest today while he’s at school. If it looks half as good as yours I’ll be happy 🙂 🙂 🙂 xXx
Clare,
How did it go? Your son will be so happy! It doesn’t have to be perfect to make his day! So much love goes into a homemade cake like this one – that is all that matters! Happy Birthday to him!
Suzanne 🙂
Hello Suz,
Good day. I was wondring if I can use marzipan instead of findant to cover the cake. I am making one for my husband as a surprise. He loves the minions so much. He prefers it than fondant icing. Any advice from you will be much appreciated.
Thanks.
I think you should use whatever you are most comfortable with. If you prefer marzipan try it! I have heard that the only problem with marzipan versus fondant is that it is slightly drier than fondant and it may rip. The nice thing about this cake is you can put the face on the best part of the minion head, and places with rips can be easily hid. Some posts suggest covering the cake with marzipan then using fondant for the details (because it is less expensive and usually easy to remove details when serving. I would love to see how it turns out! Again, do whatever is easier for you! Just make sure the pieces for the eye are slightly dry when you put in on the minion face. I had trouble with the eye drooping when the fondant was too moist.
Here are a couple of good explanations:
https://answers.yahoo.com/question/index?qid=20091220042352AAHgCqU
http://www.eats.my/recipe.php?id=208
Dear Suz,
Do you think this cake is doable with a 9 inch pan or its going to be too big. My son’s b-day is next week and I am thinking about making a big minion.
Thank you very much.
Meilisa,
Sorry I didn’t see this sooner. It just depends on how many servings of cake you need. Not everyone eats the cake at my kids parties so I just keep it six inch. Still plently.
a 9 inch huge minion would be fun, as long as someone can eat all that cake.
let me know how it goes!
Suz 🙂
Thanks so much for this tutorial! Little miss is turning two at the end of the month and LOVES “min-ins” but her mom hasn’t made a sculpted cake in years—so I needed a little help 🙂 I really appreciate the step-by-step tutorial and the recipes. Thanks again!
I’m so glad this will help. If you want to make it easier use gumpaste for the details – like the eye. I’m just so cheap when it comes to my kids birthday cakes I use only homemade MMF. Keeps the costs low but makes me CRAZY!
I bet you can’t make a spongebob cake!
We like minions more than spongebob!
I have something to tell you. I’m not a minion.
This looks AMAZING! Thanks for such a helpful guide I am definitely going to give it a go for a birthday soon.
Complete amateur here though, and wondered why it is you have a cardboard round in the middle? Does it just help with support?
Thanks!
Beth,
Yes, the cardboard is needed for support. I use rich cake layers and even richer buttercream icing. With out the cardboard the whole thing would smoosh down from the weight of all the layers.
I hope that makes sense!
Thanks for looking!
Suzanne 🙂
Just wanted to say thanks for a great post! This was my guide as I made my own minion cake.
A few differences:
– I used 7 inch cake pans
– I was too scared to use yellow fondant for the minion skin, so opted for yellow buttercream instead
– Goggle strap was simply a liquorice strap (and his hair was strands of liquorice strap)
– shoes were liquorice (I was trying to avoid black fondant)
Here’s a pic of him I uploaded (hope the link works):
http://i60.tinypic.com/k153fa.jpg
Thanks again!
Katie
Katie – I am so glad this helped! I need to find a way to link all photos of cakes people make using this tutorial!! I love it! Such a great idea to use Licorice! This looks great! I’m sure they loved it.
Thanks for stopping by.
Suzanne 🙂
Katie, I am making of a post of minion cake tips – I hope it is okay to add yours! If you don’t want it on that post let me know. It turned out great again!
That’s no problem at all!
Just had a look at it — great post! Will be very helpful.
Another thing I thought of — I made his overalls with white fondant and blue fondant spray. This had the awesome result of giving them a cool denim wash look.
Thanks again!
Katie
Katie – Thanks again for the tips! Now all my nieces and nephews now want a minion cake for their birthdays. Some are planning one with a sports theme! It’s great to find out ways to make it easier!
Suzanne 🙂
Thanks for the tutorial! I’m planning to make this for my mom as a christmas present haha she loves minions. How long did it take you to do the full cake?
Rachel,
Just make this in stages. I would bake and make icing and fondant. The decorating takes a couple of hours at least. You can do it! Send me the final picture I would love to see 🙂
You are the nicest daughter!
Suzanne
hi Suz!
Fab cake! I don’t see any imperfections at all, it looks just amazing! Just wondering how much ready to roll yellow icing you used for the minion, and how much blue? can you freeze the icing in advance , and if so, how long for?
Thanks so much
Hannah
Sorry I have been busy all summer! Did you end up making this? I usually make one batch of yello, and one half batch of blue and black (check the recipe in the link). I have frozen buttercream, but I have never frozen fondant. I hope you were able to make this!
Wow! That cake is awesome! You’re very talented. I made a simpler Minion cake last year. Check out my video tutorial on it! https://youtu.be/ODH8aVGeG60
I will have to look at your it! Thanks!
Suzanne 🙂
Hi, this cake looks awesome and I’m planning on attempting it for my son’s upcoming birthday. Just a bit confused when you say to use “one oven safe dome shaped bowl with approximately 6 inch circumference” for the head.. Surely you mean 6 inch diameter? I’m in Australia so having enough issues converting into metric, but a six inch circumference seems tiny? And now of course I’m doubting myself and thinking maybe you mean radius? Such a great looking cake. So nervous about attempting it!!
Cheers
Kristel – look carefully at the photos – I am using 6 inch round baking pans. (That’s about 15 cm). So you are probably right I made a mistake here. I meant a 6 inch diameter, so that it is the same size as all the cakes you bake. If you can’t find this size oven safe bowl (mine is from the 60s) make the dome out of rice Krispy treats using any plastic bowl that would allow the small domed top to match up with the baked layers. Does that make sense? Measurements don’t have to be exact. The notes have just helped me when I made the cake a second or third time. Just try it. The kids will love it.
Thanks so much. Yes, the tutorial and pictures have helped heaps. I’ve started making the fondant shapes. Having lots of fun experimenting and learning! We don’t have rice Krispy treats here, hehe. But I think I’ve got it worked out now. Thanks again so much for a great tutorial.
I just thought I’d update as we had my son’s third birthday yesterday and the cake was a massive hit. I absolutely loved your step by step tutorial and was so pleased with my end product. I wish I could attach a photo. Thank you so much! I’ve set the bar high for all future birthday cakes now!
Thank you for this tutorial, it has been very helpful! My daughter is turning 7 next month and wants a minion cake, only can’t choose between the regular minion or the purple minion, so I am going to do half and half…. Keep your fingers crossed for me, lol.
I made a version of this cake for my daughter’s 7th birthday today – half yellow minion and half purple minion – all out of cake and buttercream. It was nowhere near as smooth, and was more challeng8ng because it was difficult to keep the temperature of the buttercream just right, but she absolutely loved it! The is for the tips on how to get the shaping correct.